
The Secret to Serving All Your BBQ Dishes Hot & on-Time: Use a Faux Cambro

SmokedBBQSource is supported by its readers. We may earn an affiliate commission at no extra cost to you if you buy through a link on this page. Learn more.

If you’ve ever tried to cook and prepare food for a large crowd you know the struggles of getting all the food hot and ready at the same time. Planning for a large barbecue can be a true headache, especially for a novice cook.
This can be extra challenging when you have to smoke a large piece of meat like brisket or pork butt all day and have several side dishes to go with it.
Not to mention the challenges of cooking outside in unpredictable conditions. So, how can you do it?
We’ll tell you all about the Cambro method, and more importantly how to use a faux Cambro to keep your BBQ hot and on-time.
What exactly is a faux Cambro?
A Cambro, made by Cambro Manufacturing, is an essential tool used by kitchen professionals and caterers. It is an insulated box that allows them to transport food while keeping it hot or cold and within the safe temperature zone for long periods of time.

As a backyard cook though, you don’t need a commercial-grade product like a Cambro to keep your BBQ warm.
You can replicate it with a product you probably already have around the house and make a faux Cambro – a home-made insulated, hot-holding box.
If you have a large plastic cooler then you’ve got yourself the makings of a faux Cambro. Even a small soft sided cooler will get the job done.
Benefits of using a faux Cambro:
- Can keep food hot for hours while you prepare the rest of a meal
- Perfect for holding brisket that needs at least an hour of resting before serving
- Keeps food warm and avoids mess when traveling
How to use a faux Cambro to keep BBQ warm
In order to use your cooler as a faux Cambro, you’ll need to gather a few other things first.
Plan to start preparing your cooler for food-holding about 45 minutes before your meat will be done cooking. This method of using a cooler to keep meat warm was popularised by the folks over at amazingribs.com.
That way it will be ready to use when you pull the meat from the smoker.
What you need:
- A large plastic cooler
- 2 towels
- 3 gallons of hot tap water
- Disposable aluminum pan
- Aluminum foil
- Meat thermometer
1. Heat the cooler
Pour roughly three gallons of hot water into the cooler and seal it for 30 minutes.
This will pre-heat the internal temperature of the cooler getting it ready for the meat. After 30 minutes, drain the water and place one of the two towels on the bottom of the cooler.
2. Add the meat
Once the meat is done cooking, wrap it in aluminum foil and put it in the aluminum pan.
Place the meat and pan on top of the towel in the bottom of the cooler. Then place the other towel on top of the meat and pan. Close the lid.
Your meat will stay warm for 3 – 4 hours so long as you keep the lid closed and sealed. This method has been proven to keep food within the temperature safety zone – which is above 140°F.
If you have a meat thermometer probe, leave it in the meat and let the wire dangle out of the cooler.
This will allow you to check the internal temperature to make sure it’s well within the temperature safety zone. When you’re ready, serve the meat.
3. Clean your cooler
You’ll want to be sure and clean your cooler right after using it.
This will ensure it’s free of odors and safe for the next use. Some soap and water will do the trick to keep your cooler in good shape and safe for food.
Tips for creating your own faux Cambro
Now that we’ve gone over how to use the faux Cambro method, here are some pointers to ensure success.
Type of cooler
If you don’t have a cooler or if you think it’s time for an upgrade, you’ll want to make sure you get the right type of cooler.
Here are some factors to keep in mind when choosing a new one.
Size of the cooler
Make sure it is big enough for the type of meat you’ll be cooking.
If you’re cooking turkey or brisket, you don’t want to try to force those into a cooler that’s too small. Don’t forget you’re placing your wrapped meat into an aluminum pan, so it should fit nicely into the cooler without forcing it.
If you transport a lot of food, a wheeled cooler is convenient, though not a necessity. Also, you’ll want your aluminum pans to fit snugly within the cooler so as not to shift and spill any juices while on the move.
If you find there’s a lot of space around your tray of meat, fill in the gaps with more towels. This helps twofold as it will not only secure the trays in place, it will further insulate the container as well.
Insulation
A well-insulated cooler is a must. The rotomolded Yeti coolers are a fantastic option, but for the price point, you might as well get yourself a real Cambro.
For a faux Cambro, you don’t need anything fancy, just something well insulated that seals well. If it has a gasket in the lid, even better as this prevents airflow from leaving or entering the cooler.
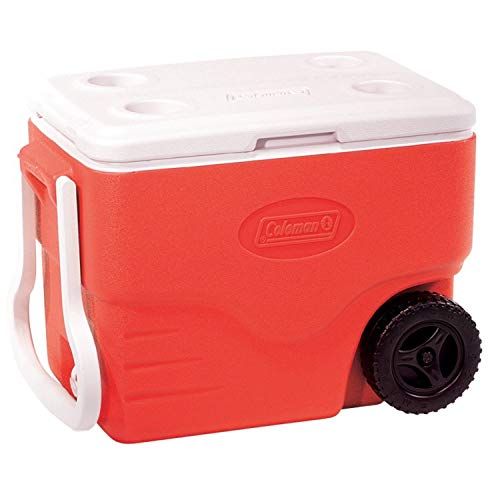
A simple Coleman 40 quartz cooler will get the job done.
Drainage and Care
You’ll want your cooler to be easy to drain as well as easy to clean. A drain plug and smooth internal chamber will do the trick.
Keeping your cooler clean and in good working order will help it last for years of backyard barbecues whether you’re hot holding food or icing down some cold beers.
Safety tips
There are a few things to keep in mind to make sure you and your food stay safe while using the faux Cambro method.
1. Use BBQ gloves
BBQ gloves come in handy when handling meat off the cooker and wrapping it to be stored in your faux cambro.
They also help keep the bark intact on the surface of your meat (using tongs or other utensils tends to strip off the flavorful outer bark).
2. Pour with caution
Use caution when pouring the hot water into the cooler as it can scald (boiling water is not necessary and can actually damage your cooler).
Check to see if your cooler’s manufacturer has a temperature rating, as some plastics can melt or warp under the high heat of boiling water. Hot water from the tap will do just fine for faux Cambro purposes.
3. Use a meat thermometer
A meat thermometer is your best friend when using a faux Cambro. You want to ensure the temperature of your food stays in the safety zone.
A probe that stays in the meat is ideal here as you don’t want to keep opening and closing the cooler lid to check the temperature. Doing so will let out heat and cool the meat faster.
Holding steady
For the backyard cook there’s no need for a food-grade Cambro just to keep your barbecue warm. At a fraction of the cost, a faux Cambro will work just as well.
All it takes is a large plastic cooler, some warm water, and a few other items to make sure your barbecue stays warm and is ready when it comes to serving time.
Just be sure to plan ahead, heat the faux Cambro, and insulate the meat to keep it in that target temperature range for 3 – 4 hours.
Have a particular cooler you use for a faux Cambro, or do you have any other tips not mentioned in this article?
Let us know in the comments section below and remember: sharing is caring! Be sure to share this article with your like-minded bbq enthusiasts.

About Your Pitmaster
Joe Clements is the founder and editor-in-chief of Smoked BBQ Source, a leading barbecue resource that has helped tens of millions master grilling and smoking. Growing up in a vegetarian household, his love for barbecue was unexpected. Determined to master the craft, he launched Smoked BBQ Source in 2016 to document his journey from amateur to pitmaster.
Joe leads a team of expert barbecue creators and oversees the largest collection of in-depth grill reviews and a library of tested, foolproof recipes. Whether he’s firing up a pellet grill or charcoal kettle, he’s passionate about making barbecue approachable and enjoyable for all.
I use an Igloo ice chest that is a Yeti type super insulated that works just as well but is 1/3rd the cost. I love mine.
Sorry- but three gallons of water for thirty minutes in the cooler? Probably you would need only half of that water. After thirty minutes, I can’t believe that the cooler is going to be any hotter with three gallons instead of – even one.
And- depends on the cooler. Unless the cooler itself is thick-walled and can retain heat, there’s no point on preheating it. The way a insulated cooler works is- by insulation.
Inside cooler Wall of cooler outside cooler
When you ‘preheat it’ – yes- you are heating up the inside, and perhaps the insulation. But the idea is that the insulation _insulates_. When you put something hot in the cooler, THAT is what provides the heat and stays warm.
If you want an insulated box to stay warm- you would do better to put a couple of jars of hot water in with the food. Hot water in a jar is going to retain and radiate a lot more heat than ‘preheating’ an insulating mug.
When you use an insulated mug to keep your coffee warm- do you put
boiling water in it for 1/2 an hour? No you just need to get the inside walls of the container hot so that as soon as you pour in your coffee/tea, it’s not dropped 15 degrees because it has to heat up the mug.
So in a large insulated box- what is providing the heat is -what you put in it- the preheating is, again, maybe heating the walls of the cooler. And definitely it’s heating up the air in the cooler. Hot air that escapes as soon as you open it.
Here’s another example. In the winter you wear a coat. The coat _insulates_ you. It doesn’t warm you. If you want, you can put your coat on a radiator or something to get it toasty, but that doesn’t keep you warm. The minute you walk outside, what’s keeping you warm is your body heat + the insulation of the jacket.
If you heat your jacket for ten minutes, or thirty or two hours- it’s not keeping you warm after you go outside. You want to keep warm? Put a hot water bottle in the coat with you.
I can go on- but you get the idea.
What are the Safety Zone temperatures?
Here’s another idea for “preparing the cooler”. Back in the day before electric blankets, we’d stay at our family cabin in colder weather. Yea, we had wood stoves, but if you didn’t get up and stoke them during the night . . .
Anyway the old timers would heat up bricks in the oven (of the wood cookstove), and when it was time for bed, they’d wrap them in a towel and place them at the foot of your bed. They’d keep your feet warm all night. I’ve actually done a similar thing in a cooler. I used those paving blocks, heated them in the oven and then used them wrapped in towels to maintain a the gentle heat in the cooler for several hours while we traveled to a Christmas pot luck dinner . . .
Glad you post different articles. It has helped me a lot since I’m a beginner in the smoking arena.
Great informative article, thank you!
I really like my Coleman Party Stacker 24-can size (model 6225) for the Cambro method. It will hold two Boston Butts or one whole brisket perfectly. They’re not making them any more and they’re pricey on eBay, but if you find one at a garage sale or stored away in somebody’s garage, grab it!
great idea. im going to try it today for football food.
Will a thick styrofoam cooler work as well as a plastic one for holding meats?
I’ve used a styofoam cooler to rest brisket and it got he job done. Does it work as well will really depend on how thick it is.