
Traeger Flatrock Griddle Review

SmokedBBQSource is supported by its readers. We may earn an affiliate commission at no extra cost to you if you buy through a link on this page. Learn more.
UPDATE: Traeger has just announced a smaller 2-zone Flatrock that will retail for $699.99.
After dominating the pellet grill market for decades, Traeger has finally released their first non-pellet grill.
That’s right, Traeger now makes a gas griddle and it’s called the Flatrock.
I’ve spent the last few days cooking on the Flatrock so I’m going to share my first impressions of this griddle and how it compares with other griddles I’ve cooked on.
You can also see the Flatrock in action in my video review below.
- Excellent wind protection
- Even heat distribution
- Fuel sensor
- Folding side shelves
- Grease drain location
Traeger sent me this griddle for free in exchange for an honest review. All thoughts and opinions are my own.
Overview and first impressions
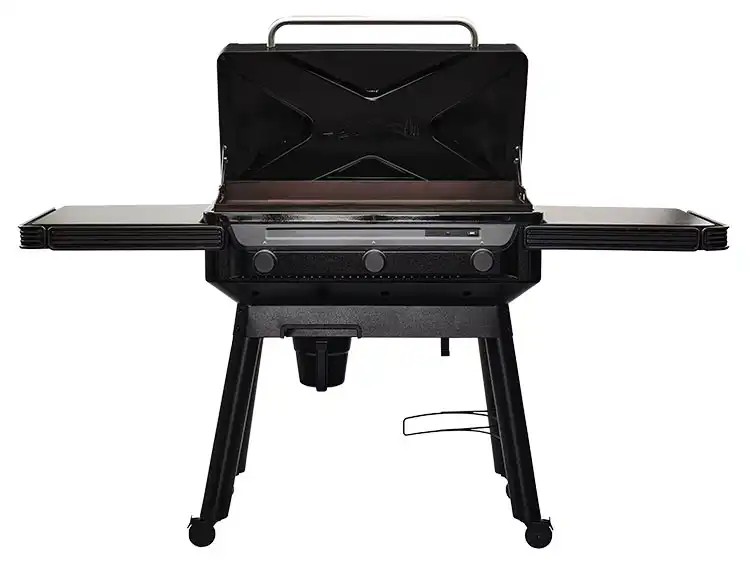
After assembling the Flatrock, I immediately noticed how the griddle is sunk down inside the chamber. I think this is a good design solution to solve “blowouts”.
All of you that live in windy areas know what I’m talking about. When a wind gust comes along, it can snuff out a burner. Or it can cause you a lot of hassle with just trying to get hot enough.
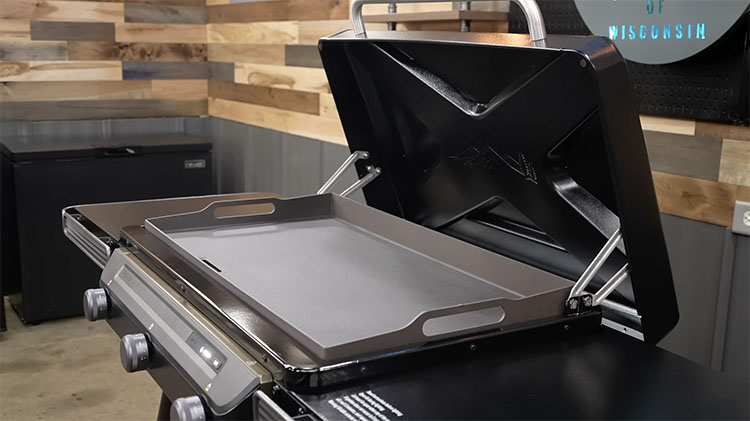

The carbon steel cooktop measures 33 inches by 18 inches and was plenty large enough for the burgers and chicken and rice I cooked for my first tests.
Traeger Flatrock Specifications
| Cooking surface | 594 Sq. In. |
| Weight | 189 Lbs |
| Burners | 3 Horseshoe burners |
| Cooktop material | Carbon steel |
| Max Temp | 600°F |
| Warranty | 5 Years |
| Price | Check Latest Price |
You’ll want to plug the Flatrock in to power to take advantage of the auto ignition and the fuel sensor. The that will calibrate how much fuel you have in your tank. With that sensor you should never run out of LP ever on any cook.
Before I started cooking those burger I wanted to check the temp on that griddle and I was super impressed with how it read about 550 to 600°F across the whole surface.
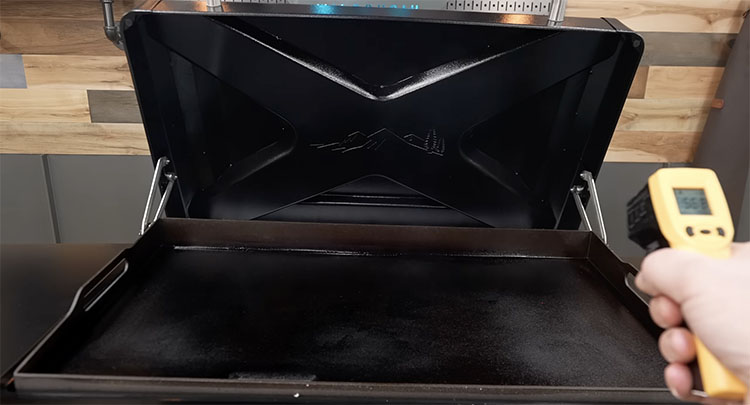
I have ran enough griddles in my life and none of them have ever read that even across the board like the Flatrock.
Most of the griddles that I’ve tested have had one side that’s a lot hotter than the other
The Flatrock has really nice lockable caster wheels that turn in 360 degrees so you can easily slid the girddle around to position it.
What I liked:
- Even heat distribution – The U-burner design on the burners resulted in the most consistent temperature of any griddle I’ve cooked on.
- Excellent wind protection – The design protects the burners from the wind.
- Fuel sensor – Never run of out fuel mid-cook.
- Folding side shelves – Give you plenty of room to work with and fold down easily to minimize storage space.
What I didn’t like:
- Grease drain location – I noticed some heat exhaust coming out of this drain port on the front so I had to be careful where I put my hand while cooking.
Unboxing and assembly
One thing that I’ve always said about Traeger is they know how to package their grills. Every Treager I’ve tested in the past has arrived in perfect condition.
They’re packed nice and tight and they’re organized and that’s the exactly how the Flatrock arrived at my door.

They even started to label on the outside of the boxes with a picture so you grab the right box for the next step that you have to assemble.

If you’ve got little kids you even get to make a fort out of the box.
The assembly was a breeze on this griddle. There’s not a lot of parts and steps to do.
It’s not that heavy but it is a little bulky so if you’ve got an extra hand it makes it a lot easier.
I actually screwed one thing up. I put one of the brackets on upside down but I didn’t have my glasses on so that’s a good enough excuse. So we had to take the side bracket off so we could put the tank bracket on correctly.
I only mention that so you pay close attention to the tank bracket on the bottom.
Configuring the fuel sensor
After it was all assembled the first thing that I did was plug it in. Yeah you heard me right we plugged in a griddle.
The next step was to calibrate the fuel sensor.

The procedure to do this was simple. Just hold the calibration tank button down for three seconds, and once the light starts sweeping from right to left place the tank on the hook underneath the griddle. It’ll take about 15 seconds to figure it out, but once it’s done it’s going to beep, and the LEDs are going to start flashing.
Then just hook up the hose, and if you’re ready to start it up.
Because of prior experiences I’ve had with griddles and even gas grills not lighting up on the first try, removed the griddle off the Flatrock (easily done thanks to the handles) to watch and make sure that all three burners ignited.
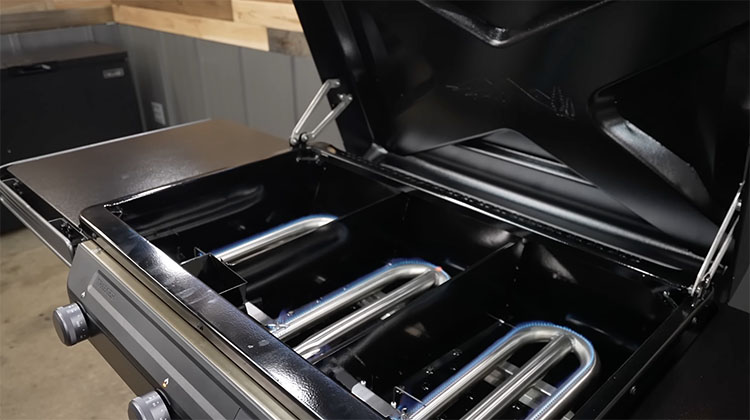
I’m happy to say that each horseshoe burner lit up instantly so I was pretty relieved that I didn’t have to adjust any burners or igniters
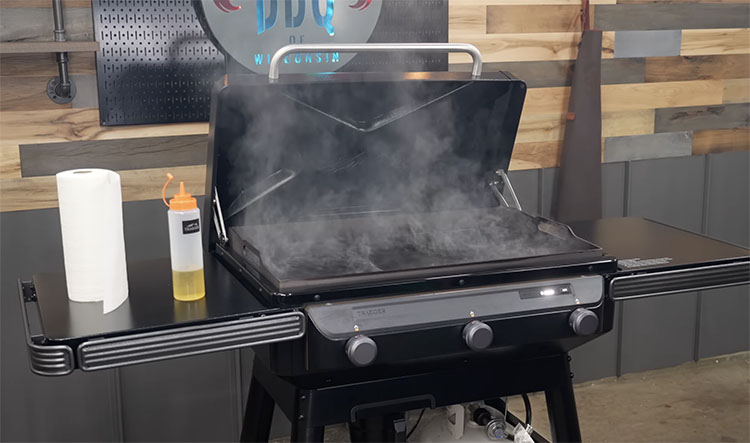
Seasoning the Flatrock
Doing the seasoning on the Flatrock is the same as every rolled steel griddle. If you’ve never seasoned a griddle before, it’s really easy.

- Turn all the burners on then hit the ignite button and leave the burners on high and preheat for 10 minutes.
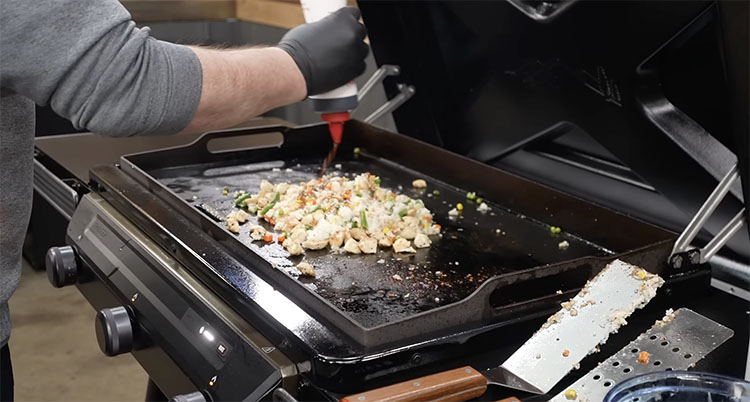
- Add some flaxseed or canola oil (or lard or beef tallow), squirting across in a zigzag pattern.
- Take some papertowel, or a cloth and with tongs or protective gloves wipe the excess oil and buff it up a bit.
- It’s gonna get pretty smoky but just let it go and once it stops smoking it’s time to apply another coat
- You need to put at least four coats on. I actually coated my Flatrock five times which took me about 50 minutes all up.
You’re going to want to shut off the valves and let it cool down for at least 30 minutes
Design
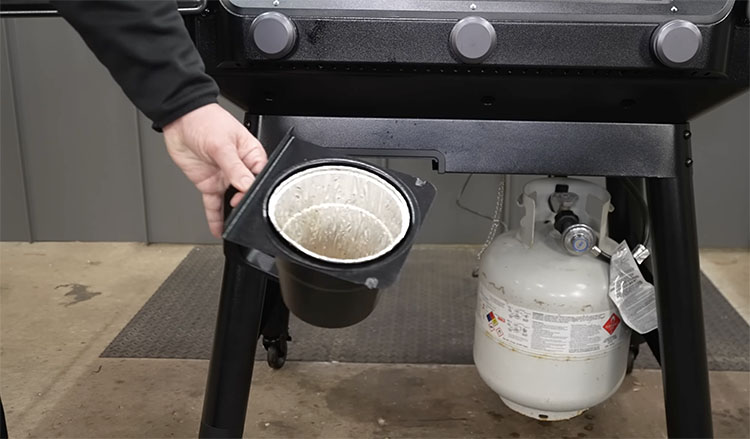
I really like how they borrow from the new Timberline’s pellet ash clean-out design. The Flatrock uses the same grease pail.
If you use a griddle a lot you know that you never have enough room but the side shelves are pretty big.
I’ve always had issues with leaving the little squeeze bottle too close to the griddle, and having it start melting. With these big shelves and with the pop and lock technology I see myself actually getting some accessories for this griddle someday.
The P.A.L system currently allows you to add a cup holder, storage bin, accessory hook or paper towl holder and I imagine this will expand in the coming months.
The other nice thing about these shelves is that they fold down so it takes up a lot less space for storage and they work really easy and slick and they’re pretty dang sturdy.
The lid is feels sturdy, and seals really tight.
One thing I noticed while cooking on this griddle is that because the grease port is right in the front and the chamber is all closed, there is a little bit of heat exhaust coming right out of this port, so when you’re cooking around it, you’re just going to have to work on the left-hand side of it or on the right-hand side of it.

You might not like the fact that you have to use electricity to make this griddle work, but electricity does give you a couple of cool features. Most of you reading this are cooking in your backyard anyway, so this way, you’ll have your barbecue pit or your Traeger Pellet Grill along with your griddle.
Cooking on the Traeger Flatrock
One of our favorite ways to use the Flatrock is cooking steak. The entire surface gets nice and hot and can produce an amazing crust.
It’s also been great for making tacos. We even did a recipe for Griddle Crunchwraps using the Flatrock.


Should you buy the Flatrock?
I was very impressed with the Traeger Flatrock. I certainly think that Traeger are going to be able to compete with Blackstone and
Now, it’s a lot of money to spend on a griddle, especially when you compare it to the original Blackstone.
There’s definitely a Traeger preimum, so it really comes down to whether or not there are enough bells and whistles for you to justify the price.
- Excellent wind protection
- Even heat distribution
- Fuel sensor
- Folding side shelves
- Grease drain location

About Your Pitmaster
Jeff “Ricer” Rice is the face of the Smoked BBQ Source YouTube Channel, where he brings expert BBQ equipment reviews and mouthwatering cook videos to life. A lifelong barbecue enthusiast, some of his fondest memories have been made around a pit, and he’s passionate about sharing that experience with others.
Whether he’s testing the latest gear or firing up the smoker, Jeff takes a real, no-nonsense approach to barbecue, making it easy for anyone to fire up great BBQ at home.
Re: “…removed the griddle off the Flatrock (easily done thanks to the handles) to watch and make sure that all three burners ignited.”
I bought this griddle and thought the same thing but then I realized the LED over each knob tell you if the burner is heating to temp or not. I don’t need to see the burners, I just need to see the LED light up.
Re your comment on removing the griddle to make sure that all three burners ignite.
I bought this griddle and thought the same thing but then I realized the LED over each knob tell you if the burner is heating to temp or not. I don’t need to see the burners, I just need to see the LED light up.
I just did it for the first initial start up to see how the burners perform for the review. Thanks for watching!
I have a Blackstone that I am going to part with for the Traeger.
Blackstone: Can’t tolerate the backside grease trap. It also seems to spit grease on the rear side. And if you don’t have the cover on and it rains, it will fill with rainwater.