
Competition Pork Spare Ribs

SmokedBBQSource is supported by its readers. We may earn an affiliate commission at no extra cost to you if you buy through a link on this page. Learn more.
If you asked ten competition pitmasters how they prep and smoke their spare ribs for a cookoff, you would get ten different answers.
Everyone has their style and preference, and, depending on where you are located, there are different rules and guidelines depending on who is sanctioning the event.
Today I’m going to share some tips and tricks to prep, smoke, and slice award-winning ribs, as well as cover some things that judges look for at different events.
Competition style ribs
Whether cooking in a competition or the backyard for your mates, you want your ribs to taste amazing.
But there is an extra level of precision that is required if you are going to win big points with the judges.
You will need to pay extra attention to the appearance of your ribs. Judges will be looking for uniformity of size and shape.
It is worth remembering that you need to wow the judges in a couple of bites. So your ribs will need to pack a punch flavorwise.
How to make competition-style pork spare ribs
1. Choosing your ribs
The quality of your pork is important when you are competing. High-quality pork will be a dark red color with a rich flavor and maximum juiciness.
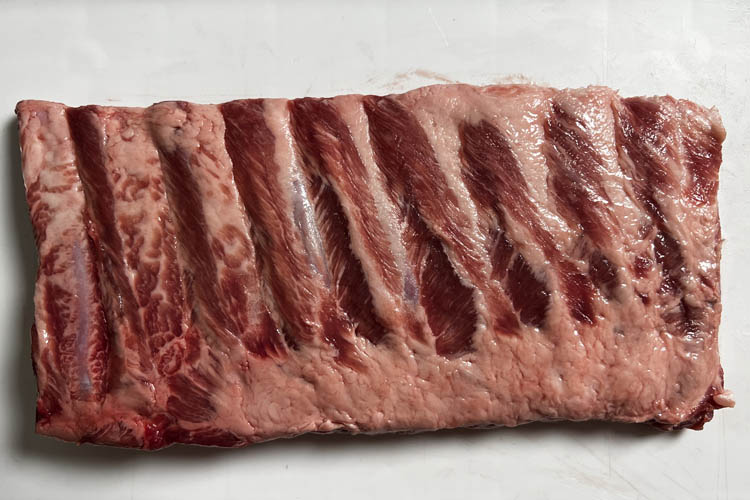
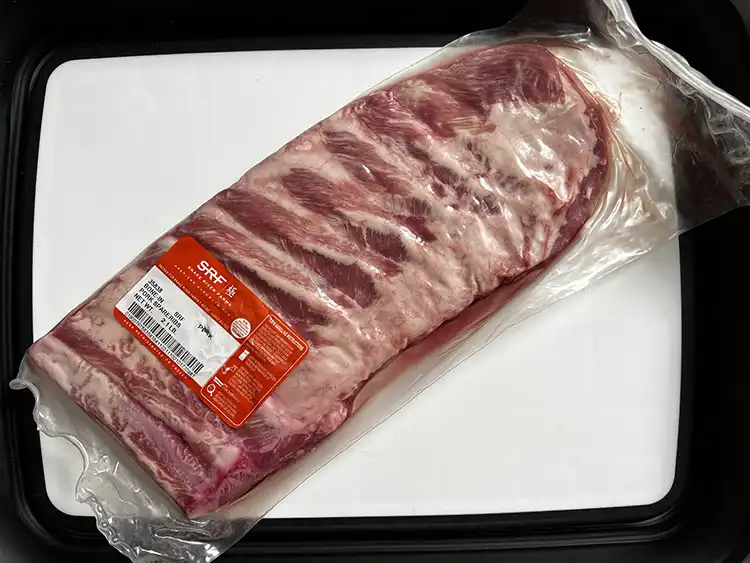
I used Snake River Farms 100% Berkshire (Kurobuta) pork ribs for this recipe.
I recommend purchasing St. Louis cut spare ribs for competition, though you can alternatively trim a full rack of pork spare ribs into a St. Louis-style cut, and make BBQ rib tips with the scraps.

The great thing about the Snake River Farms ribs is they do come pre-cut in the St. Louis style, which will save you time during prep.
2. Prepping your ribs
If you bought a full rack of spare ribs, you will need to trim the ribs to prep them for competition.
Smoking a full rack of ribs untrimmed can result in a tough bite for the judges. This is because the edges of the ribs and the breastbone section tend to have a lot of connective tissue and cartilage in them.
To trim a rack of spare ribs into a St. Louis cut:
- Make a horizontal cut down the rack length to remove the breastbone portion.
- I recommend removing 1 to 2 bones from the wider end of the rack to leave yourself with a perfectly uniform rectangular shape.
- Trim any loose meat hanging from the edges or sides of the rack.

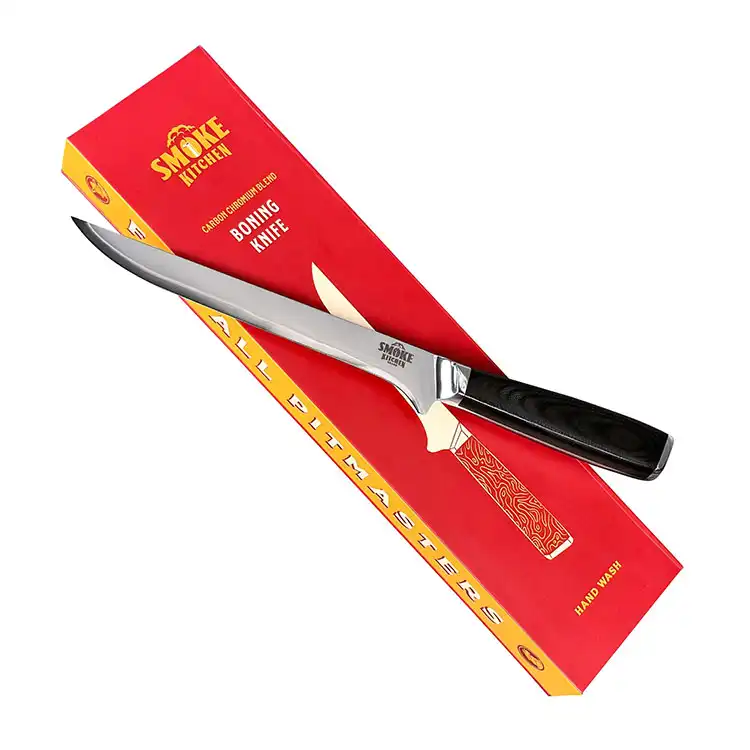
Use a sharp boning knife to trim your ribs like our Smoke Kitchen 6.5” Boning Knife. It features a carbon and chromium bend blade that is flexible enough to be agile, but still sturdy and sharp enough to leave you with clean cuts.
Trim the fat cap off a brisket or square up a rack of ribs in seconds.
- Designed by us for BBQ trimming.
When your rack is fully trimmed, it’s also important to remove the membrane from the back of the ribs.
While the membrane is perfectly edible and fine to leave on if you are cooking in your backyard, it’s best to remove it for competition as it can potentially create a tougher bite for the judges.
To remove the membrane
- Flip the rack over so that the bone side is facing upward
- Locate the center of the rack between the two middle bones and slide your finger gently under the membrane until you have lifted it across the entire width of the rack
- Adjust your grip and pull straight up, and the membrane should come off quickly in one piece.
- It’s helpful to use a paper towel to get a better grip on the slippery membrane

3. Seasoning your ribs
Now that your ribs are prepped, it’s time to add some flavor!
Some pitmasters create their own rubs, others use store-bought rubs, and some use a combination of the two.
If you prefer to make your own rub at home, check out our Ultimate Dry Rub for Ribs recipe!
Before adding your seasoning, it’s helpful to use a binder, such as olive oil or yellow mustard. It doesn’t affect the flavor of the meat because you are using just a very thin layer, but it helps the seasoning stick to the ribs evenly.
I like to start seasoning my ribs on the back side (bone side) to protect the appearance of the meatier side for presentation purposes.

Apply a thin, even layer of the rub to both sides of your rack, and use any remaining rub to ensure the sides and ends are also coated.
Once they are seasoned, you want to let them sit at room temperature for about 15 to 20 minutes to let the seasoning penetrate the meat.
Plus, that gives you time to fire up the smoker!
4. Firing up the smoker
Preheat your smoker to 225°F.
When I’m competing, we have a full competition BBQ trailer that we tow to cookoffs that has an offset smoker, a vault, and a couple of barrels on it. But, when I’m cooking in my backyard I will sometimes opt to use one of my pellet grills just to save time and hassle.
Whichever style of smoker you choose is totally fine, as long as you can maintain a steady temperature of around 225°F through the entire cook.
For this recipe, I used my Grilla Grills Grilla (AKA: The OG). It holds a steady temperature and produces a generous amount of smoke to give ribs a great, smoky flavor.
Now, for the wood, I recommend a combination of post oak and pecan wood – but any mild wood will work fine (think: apple, cherry, etc.).
I would stay away from woods with harsher flavor profiles like mesquite or hickory as they can overpower the pork with too heavy of a smoke flavor.
5. Smoking your ribs
Place your ribs directly on the grates of your smoker.

If you are using an offset smoker, position the ribs at least 1 to 2 feet from the fire box to prevent them from cooking unevenly.
If you are using a barrel smoker, include the deflector plate so the bottoms don’t cook too quickly or burn.
You’re going to let them smoke for about 2 hours. I like to spritz them with a bit of apple juice every 30 minutes or so to help build a better bark and keep the bark from drying out or cracking.

Keep your barbecue nice and moist with this 68 OZ pressurized spritz bottle.
- Control spray from a fine mist to a solid stream
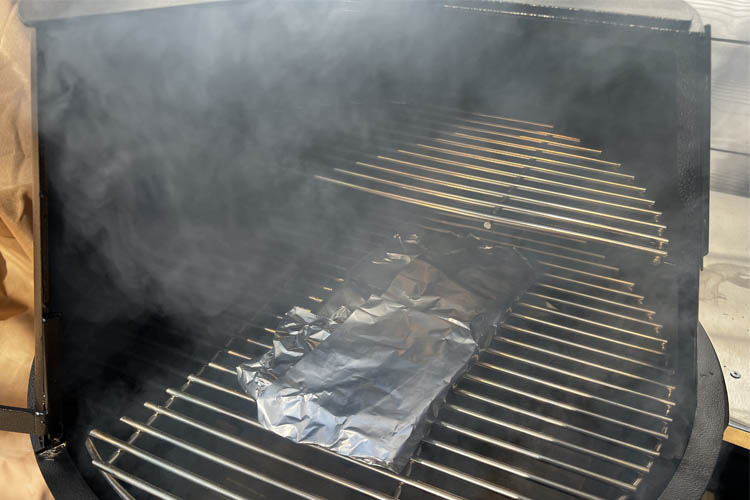
After two hours have passed, lay down a sheet of heavy-duty aluminum foil – I don’t recommend using regular-duty foil, as it can be ripped or torn by the bones in the ribs very easily.
Now, we’re going to get a little controversial here…
When I wrap my ribs I use Parkay Squeeze Margarine. Sometimes people are shocked to hear that, but I have a good reason. Parkay is easy to apply to the foil in a zig-zag pattern, and it also has a higher smoke point than regular butter. It also adds more moisture than butter does.

If you just cannot bring yourself to use bottled margarine it’s OK to use a few pats of regular butter instead – you do you!
Lay down the Parkay in a zig-zag pattern about the same length as the rack of ribs, then sprinkle on the remaining BBQ rub, and drizzle on your favorite breakfast syrup

When your wrap is prepped, remove your ribs from the smoker and flip them meat-side down onto the butter/syrup mixture.
Wrap them tightly in foil and place them back on the smoker for another hour. When you place them back on the smoker, keep them with the meat facing down and the seam of the foil facing upward to prevent losing any of the wrap mixture.
After another hour, the final step is to open up the foil, flip the ribs over, and coat them in a very light layer of barbecue sauce.
Remember, these are competition ribs, so you don’t want to just douse them in sauce. I recommend using a silicone basting brush to apply a thin layer of sauce over the entire rack.
Once the sauce has been applied, leave the foil open and let them smoke for another 30 minutes to an hour until the bones of the ribs are sticking out about ½”.

I don’t personally use a temperature probe when I am cooking ribs (I know, GASP!). I’ve honestly never done it because the bones in the ribs and the feel of the rack is really what I’m looking for.
If you do want to use a temperature probe, you’re looking for a final temperature of about 200°F to 205°F and they should be fully probe tender.
When your ribs are just about done, grab a basting brush and brush on a nice layer of the butter/syrup mixture that remains in the bottom of the foil. This will give your ribs a beautiful, glossy appearance and last little touch of flavor.
Let them smoke for about 5 more minutes, then pull them off.
6. Resting and slicing your ribs
You want to let your ribs rest for about 15 to 20 minutes at room temperature before slicing. This will allow them to cool down a bit and make it easier to get the nice, even, uniform slices that the judges are looking for.
When it’s time to slice your ribs, the knife you use is also very important. I recommend our Smoke Kitchen 12” Meat Slicing Knife.

Now, depending on the rack of ribs, sometimes the bones are not quite as straight as they appear. The worst feeling is slicing into a rack, thinking you’re about to end up with a perfect rib, and BOOM, you hit a bone. Well, I have a trick to prevent that…
Grab a toothpick and push it down between the bones every inch or so where you plan to slice. This will not affect your presentation, but it will ensure that you only have to make one slice, and the rib will be perfectly straight.
When slicing competition ribs, you want them to be as uniform as possible. This is why we usually smoke 4 to 5 racks for every competition, even though we only need to turn in 9 ribs (IBCA).

Turning them into the judges
Depending on where you live and where you are competing, you may find different organizations that sanction barbecue competitions.
In my experience, the most popular are the International Barbecue Cookers Association (IBCA), the Kansas City Barbeque Society (KCBS), and Champion’s Barbecue Alliance (CBA).
I’m aware that there are others out there, but I don’t have personal experience competing on other circuits so I’m only going to cover the ones I’ve actually competed in to ensure I’m giving you accurate information.
Here are the guidelines for each of the organizations (at the time this article was written):
IBCA Rib Turn-in Guidelines
Ribs: Contestants must submit nine (9) individually cut Pork Spare Ribs with the bone intact (St. Louis Cut is acceptable). Ribs may be cooked with sauces or other liquids, but you may not add sauce after cooking is complete and the ribs are put in the tray.
Garnish: Garnishes are not permitted. Only the containers and foil provided by the head judge may be utilized for turn-in.
Container: You will be provided a Styrofoam tray with a hinged lid and a single sheet of aluminum foil. Ribs must be placed in the container with the meat side up lying fully parallel to the hinge.
KCBS Ribs Turn-in Guidelines
Ribs: Pork Spare ribs, St. Louis cut, or baby back ribs are permitted. Contestants must submit at least six (6) separated and visible portions of meat. The ribs must be submitted bone-in and the judges cannot cut or slice the ribs to separate them. Country-style ribs are prohibited.
Garnish: Garnish is legal but optional. If you opt to use a garnish it will not play a further role in appearance score. Approved garnishes include: chopped, sliced, shredded or whole leaves of fresh green lettuce, curly parsley, flat leaf parsley, curly green kale, and/or cilantro.
Container: No marking of the container in any way is permitted. You may not include aluminum foil, toothpicks, skewers, or other foreign materials in the turn-in box.
CBA Ribs Turn-in Guidelines
Ribs: Pork spare ribs, St. Louis cut, or baby back ribs are permitted. Contestants must submit at least six (6) separated pieces of meat. Ribs must be individually cut and bone-in. Ribs may be cooked with sauces or other liquids, but you may not add sauce after cooking is complete and the ribs are put in the tray.
Garnish: Garnishes are not permitted. Only the containers and foil provided by the head judge may be utilized for turn-in.
Container: You will be provided a Styrofoam tray with a hinged lid and a single sheet of aluminum foil. No foreign materials may be added to the turn-in container.
Final Thoughts
Whether you are gearing up for your first barbecue competition, looking to improve your craft, or just want to try your hand at some competition ribs in your backyard, I hope this article was helpful.
Competition barbecue may seem like a lot of work and extra steps, but the result is some amazing food that you can’t find anywhere else.
As I mentioned before, every pitmaster cooks differently. The following recipe has worked for me for years and years, but feel free to put your spin on it and make it your own. That is what great barbecue is all about!

Competition Pork Spare Ribs
Ingredients
Ribs
- 1 rack St. Louis cut pork spare ribs - (see note above for trimming standard spare ribs)
- 1 tbsp Olive oil - or yellow mustard
- 2 tbs BBQ rub
- apple juice - for spritzing
Wrap
- 2 tbsp Parkay Margarine Squeeze Spread - You can also use pats of butter see note 1) below.
- 1 tbsp BBQ sauce
- 2 tbsp breakfast syrup
Sauce
- 2 tbsp BBQ sauce
Instructions
- Start by flipping your ribs meat-side down and removing the membrane from the back of the rack (see note above on membrane removal).
- With a sharp boning knife, trim off 1 to 2 ribs from the end of your rack to square off the rack. You are shooting for a uniform, rectangular shape.
- Trim off any loose meat along the sides of the rack.
- Coat both sides of your rack in a very thin layer olive oil to act as a binder for your seasoning.
- Starting with the back side (bone side), apply an even layer of seasoning on both sides of your ribs. Sprinkle any remaining rub along the exposed sides and ends of the rack.
- Let the ribs rest at room temperature for 15 to 20 minutes until the meat starts to sweat and the rub is shiny/moist.
- While your ribs are resting, preheat your smoker to 225°F with a combination of Post Oak and Pecan wood (or pellets, if applicable).
- Once your smoker reaches 225°F, place your ribs directly on the grates.
- Smoke for 2 hours and spritz with apple juice every 30 minutes.
- Cut a sheet of aluminum foil that is 3x as long as your rack and 4x as wide.
- Spread the Parkay Squeeze Margarine down the center of the foil in a zig-zag pattern that is about the same size as your rack of ribs. Sprinkle on the remaining barbecue rub, then add the breakfast syrup in the same fashion as the margarine.
- Remove your ribs from the smoker and place them meat-side down on top of the butter/syrup mixture and wrap them tightly (see note above regarding wrapping technique).
- Place the ribs back on the smoker with the meat side down and the seam of the foil facing upward and let them smoke for 1 more hour.
- Unwrap the foil and bunch the sides together to create a boat-like shape, then gently flip the ribs over so that the meat is facing upward.
- Coat the top of the ribs in a thin layer of barbecue sauce. Do not use more than you need to just get a very thin layer across the entire rack (you may use more or less depending on the size of your rack).
- Leave the foil open and allow the ribs to smoke for another hour until the bones are exposed about ½” and the meat is probe-tender. If you choose to use a thermometer, you should expect a temperature between 200°F and 205°F.
- Use a small basting brush to gently coat the ribs in the remaining butter/syrup mixture in the bottom of the foil until they are evenly moist and shiny. Let them cook for 5 more minutes.
- Remove your ribs from the smoker and allow to rest for 10 to 15 minutes.
- Slice the ribs between the bones in equal-sized cuts (see note above for rib slicing techniques).
- Serve immediately and enjoy!
Notes
- Do I need to use Parkay Squeeze Margarine? No, you could use a couple of pats of butter but we find Parkay easy to apply to the foil in a zig-zag pattern, it has a higher smoke point than regular butter and also adds more moisture than butter does.
Nutrition
Nutrition information is automatically calculated and should be used as an approximation only. If you’re worried you could always add a side of kale.

About Your Pitmaster
Breanna Stark is a Texas-based competitive pitmaster and barbecue educator. She grew up cooking over charcoal and open flames while camping with her father, sparking a lifelong love of barbecue. Since 2014, she has competed in over 100 IBCA, KCBS, and CBA events, earning recognition for her award-winning chicken and Texas-style barbecue.
Passionate about recipe testing and development to create approachable dishes that help backyard cooks level up their barbecue skills. Breanna shares her expertise with over three million followers on social media.
Parkay/Margarine is gross. FYI butter has a smoke point somewhere between 300*-350*. About 100* lower than your cook temperature in this post.Furthermore butter has 16%-18% water content.Parkay has 12% making butter a better choice as far as water content is concerned.No need to follow all the Parkay using boys & girls just b/c they all are using it.I`m using butter here.
Like we say in the recipe, you can use pats of butter if you don’t like or don’t have Parkay
I’ve never been able to cook ribs in 4 hours at 225 degrees. I tried this recipe anyway and they were nowhere near done following thie times given. More like 6 hours. Are you sure your times are accurate?
Hi O’Neil, sorry to hear the ribs weren’t done. These times should be fairly accurate, although you’re always better going off of temp/feel as so many factores can influence how long BBQ can take. Couple of thoughts:
1 – These are for ‘comp style’ which to us means the ribs should have bit more bite, if you’re going for more close to fall off the bone then give the 3-2-1 recipe a try, or stick with baby back ribs which cook faster.
2 – Did you trim these into a St. Louis style? It shouldn’t effect cook time much, but could be a small factor.
3 – Are you based in the US or overseas? I know in Australia spare ribs can be quite a bit larger and more meaty, which can make the cook times take a lot longer.