
Cold Smoked Cheese: A DIY Guide
SmokedBBQSource is supported by its readers. We may earn an affiliate commission at no extra cost to you if you buy through a link on this page. Learn more.
Smoked cheese is a decadent, tasty treat and usually the purview of specialist grocers, but what if it didn’t have to be?
If you have a grill, you can cold smoke cheese in your own backyard with a minimum of fuss, and we’re going to show you how.
What you’ll need to cold smoke cheese
To the uninitiated, smoking your own cheese can seem like a daunting task, but it’s actually relatively simple, and you don’t need any specialized equipment to do it.
The first thing you will need is a grill or smoker, and your cold smoking method is going to be slightly different depending on what equipment you have available.
1. Using a smoker
Obviously, a smoker is the ideal piece of kit to use to smoke your cheese. If you are buying one specifically for this task, look for a model with plenty of ventilation.
The quickest way to bring your cheese smoking adventures to a crashing halt is to melt your cheese, so it’s vital to use a smoker with reasonable temperature control. You’ll want to keep your smoker no hotter than 90°F (32°C).
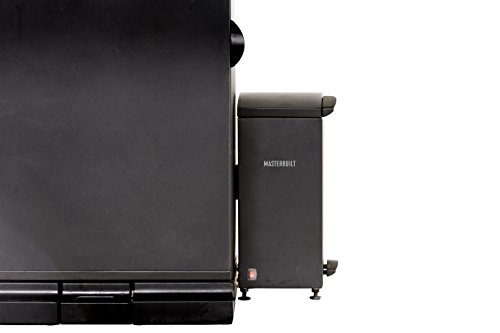
There are plenty of excellent smokers on the market for beginners, but if you are planning on smoking a lot of cheese, you may want to consider an electric smoker like the Masterbuilt, which has an optional cold smoking attachment.
2. Using a charcoal grill
If you don’t have a smoker, don’t worry, your standard charcoal grill can work just as well. You’ll just have to adjust your technique.
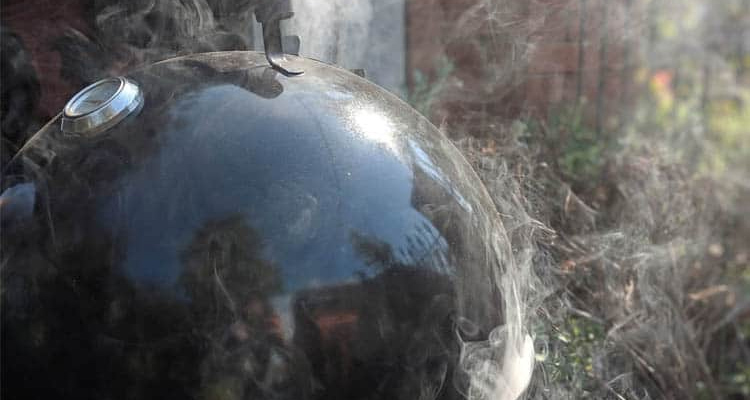
In order to cold smoke cheese in a grill, you’ll need one with a lid, and it will need to be outside. Unless you love smoked cheese so much that you want your entire house to smell of it.
To smoke cheese in a charcoal grill, it’s best to use a variation on the two-zone cooking method.
- Light between three and six coals, depending on the size of your grill, and group them to one side of your firepit.
- Once they ash over, place your wood chips on top of the coals.
- Place the cheese as far away from the heat of the coals as possible, on a rack over a dish of ice to keep the temperature low.
The idea here is that the coals cause the wood to smolder, creating that great smoky taste, while the dish of ice keeps the cheese from melting, and the lid keeps the smoke circulating around the cheese.
3. Using a gas grill
A gas grill can be used just as easily as a charcoal grill to smoke cheese, but you will need a few extra pieces of kit.
Unfortunately, most gas grills kick out enough heat to get above 90°F (32°C) even on the lowest setting. Those extra BTUs are great for searing up a steak, but they’ll turn your cheese into a puddle in no time flat.
To remedy this issue, you’ll need to use your gas grill as a way to contain and distribute the smoke over your cheese and rely on a smaller source of heat to produce the smoke.
One of the best ways of doing this is to invest in a cheap electric hot plate, somewhere in the 750-watt range.
Your wood chips will go in an aluminum dish on top of the hotplate, covered with foil with holes poked in it to avoid flare-ups. The low heat of the hot plate will cause them to smolder without melting the cheese, which will be suspended over ice in a similar manner to using a charcoal grill.
Using your gas grill to cold smoke cheese requires a little extra effort, but getting a cheap hot plate is usually less expensive than investing in a smoker, and you can still use the hot plate on its own.
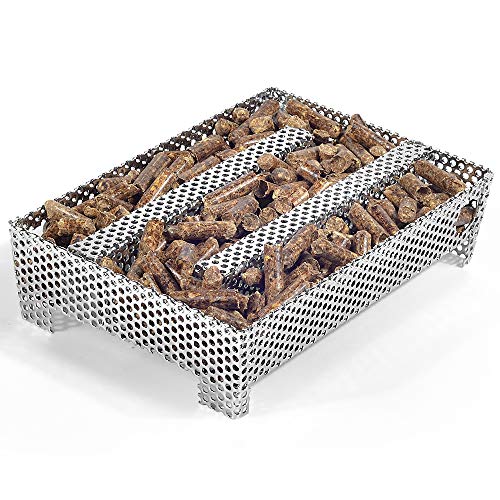
4. Use a cold smoke generator
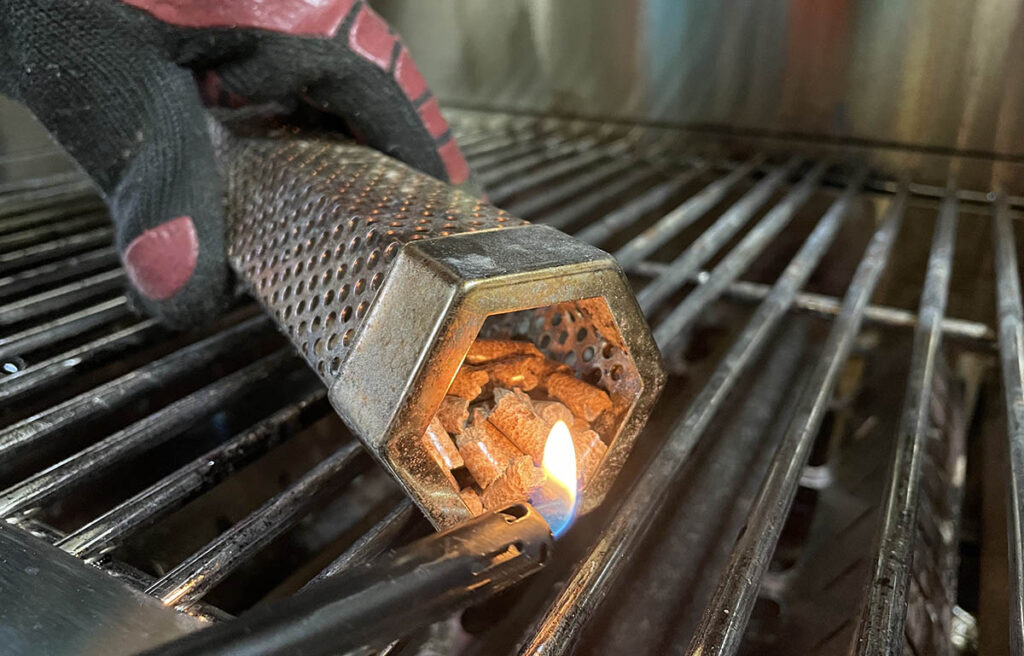
You can buy various tubes, trays, and cold smoke generators that can be placed inside a grill or smoker and produce smoke with little to no heat.
These tubes are usually designed to hold wood pellets, can are lit at one end and then left in your grill chamber.
Each model holds different amounts of pellets and or wood chips, and you can always reload them multiple times for an extra long cook.
This is a good option if your smoker isn’t capable of low temperatures, but allows you to still take advantage of the insulated environment for the smoking to take place.
Fuel for smoking
Now you’ve got your smoking equipment set up, it’s time to talk about what smoking fuel you’ll be using.
Charcoal vs. wood chips vs. pellets
When it comes to smoking delicate foods like cheeses, you need to pay close attention to what fuel you are using and the wood chips you use to create that smokey flavor profile.
If you are using a charcoal grill, be sure to invest in all-natural lump wood charcoal.
Some people claim that charcoal briquettes produce an unpleasant chemical aftertaste and, while the evidence for that is mostly subjective, it’s probably best to err on the side of caution and use lump wood charcoal instead.
Your wood chips, and you’ll want the smaller chips, not chunks, should be chosen to match the favor of your cheese. If you are looking for a milder smoke profile, then go for apple or cherry wood. If you enjoy something bolder, then hickory or mesquite are great choices.
Most pellet smokers, unless equipped with a cold-smoking attachment, run too hot to smoke cheese in. However, if you do want to use wood pellets, there is another option. The Buzzlett Pellet Smoker can be filled with wood pellets and used in place of your tin full of wood chips.
Other fuels
If you fancy experimenting with other fuels to provide that smokey flavor, then there are a few lesser-used options.
Sawdust can be substituted in for wood chips and used over a hot plate or charcoal. Sawdust doesn’t tend to burn for long enough to be useful for smoking meat, but it works well for the shorter smoking times needed for cheese.
If you want a more traditional approach, you could also use straw or hay as the Italians do with cheeses like Scamorzi Affumicate. Straw and hay both produce quite a strong flavor, so smoking times can be as short as around 10 to 15 minutes.
Cheeses to smoke
Cheese choice is just as important as your choice of smoking fuel.
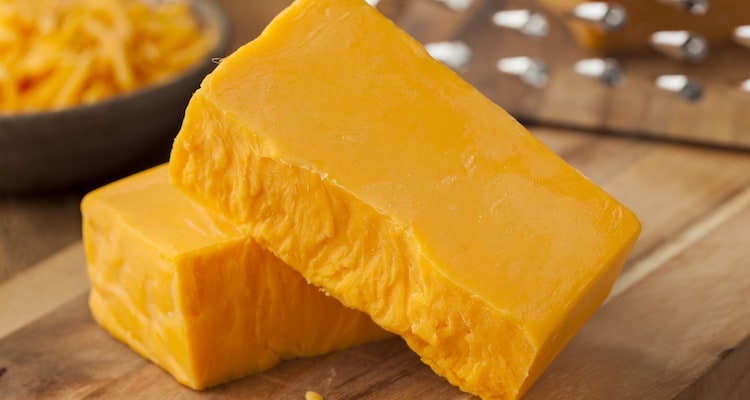
Cheeses like Cheddar, Brie, Colby, Gruyère, pepper jack, mozzarella, and provolone are all excellent choices, but the trick is to match the cheese with your chosen wood chips.
A good rule of thumb is that it’s best to pair strong-flavored cheeses with mild woods, so the two flavors complement each other without becoming overwhelming.
You can, of course, smoke multiple types of cheese at once. If you are doing this, we suggest you use the toothpick method to tell them apart.
Smoking leaves the cheese with a hay colored patina that can make them difficult to tell apart. Assigning each cheese a certain number of toothpicks (one for cheddar, two for provolone, etc.) will help you tell them apart after they’ve been smoked.

As we mentioned earlier, the trick to cold smoking cheese is the “cold” part.
You’ll need to keep that temperature down below 90°F (32°C) at all times, which means getting a thermometer and making regular checks.
Condensation issues
If you are transferring your cheese straight from the fridge to your smoking set up, then you may find it develops a fair amount of condensation on it during the smoking process.
There is some suggestion that this condensation can reduce the amount of flavor imparted to your cheese because the smoke particles stick to the water, not the cheese.
Thankfully, cheese takes on flavors quite quickly, so this shouldn’t be much of an issue.
If you are concerned, however, you can cut down on the amount of condensation by bringing the cheese up to room temperature before smoking it.
How to cold smoke cheese at home (step by step guide)
With your smoking rig set up and your cheese and wood chosen, it’s time to get started! All you need to do now is follow our step by step guide:
1. Prepare your cheese
Once you’ve chosen your cheese, using the suggestions we made earlier, you need to slice it into smaller blocks. The greater the surface area, the more smoke the cheese will absorb.
Remember to use toothpicks to differentiate between the cheeses if you are smoking more than one kind.
2. Light the fuel
If you are using a charcoal grill, light your coals and make sure they are grouped tightly at one end of your firepit.
If you’re using a gas grill, remember that we aren’t using the burners. Get your hot plate set up and turn it to its lowest temperature.
Once your coals are ashed over, or your hot plate is warmed up, place your chosen fuel, be it wood chips, pellets, or even hay, over the heat, and wait for it to start to smolder.
This is also a good time to take your first temperature measurement and make sure it is below 90°F (32°C).
3. Place the cheeses in the smoker
Once your fuel has started smoking, and the temperature is below 90°F (32°C), place your bowl of ice in your smoker or grill and suspend your cheese above it using a fine wire mesh, like a cake cooling rack.
If you are using a smoker, place the cheeses on the highest rack and make sure all the vents are open. If you are using a gas or charcoal grill, you’ll want your cheeses as far away from the heat source as possible.
4. Smoke the cheeses for 2 – 4 hours
Cheese does not need to be smoked for an extended period of time. Two to four hours when using wood chips or pellets is fine, and it can be as short as 15 minutes if you are using hay.
You’ll want to maintain a constant, light blue cold smoke during this time and open the smoker up every 30 minutes or so to rotate and flip your cheeses to give them maximum exposure to the smoke.
Keep checking your temperature and open your smoker or grill up if it gets anywhere near 90°F (32°C).
5. Remove and rest the cheeses
Resting the cheese is almost as important as the smoking process. Freshly smoked cheese can be quite bitter and will need some time to relax and mature to develop that perfect smokey taste.
Your cheese might have some oil or condensation on it after smoking. Dab that up with some kitchen towel, and then wrap your cheese in waxed butchers paper and store it in the refrigerator.
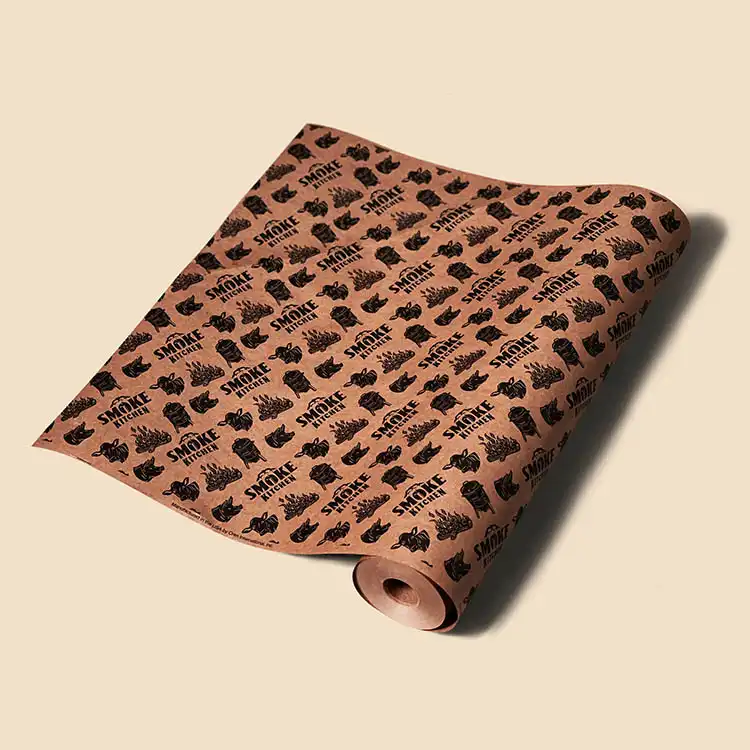
100% FDA-approved food grade butcher paper designed for wrapping barbecue. Made in the USA
You should rest your cheeses for a minimum of 24 hours after smoking, but for the best results, you should wait up to two weeks. We know, delayed gratification sucks, but it will be worth it in the end.
6. Unwrap, slice, and enjoy!
After the waiting is done and the flavors have matured, you can unwrap your cheese and dig into the fruits of your labors!
Wrapping it all up
As you can see, cold smoking your own cheese isn’t that difficult at all. In fact, it’s really quite easy. All you need is the right set up and to follow the steps we’ve outlined above.
The tricky part is fine-tuning the process to get the right smoking times and cheese/wood combos that suit your tastes. The good news is that you get to eat all your experiments!
Do you have any great combos of smoking woods with cheese? Perhaps you’ve mastered the cold smoking technique and have some helpful tips for those just starting out? We’d love it if you told us in the comments below.
My first look at your site ,all i can say is BRILLIANT
Cheers Graeme
I smoke a lot of cheese and I love my Big Kahuna which makes it so easy. You don’t even need a grill, any chamber will do (although I hooked it up to my Weber for hot smoking too) http://www.smokedaddyinc.com/