
How to Use a Charcoal Smoker: Definitive Guide
SmokedBBQSource is supported by its readers. We may earn an affiliate commission at no extra cost to you if you buy through a link on this page. Learn more.

Charcoal smokers have developed a bit of a reputation, perhaps unfairly so, for being a challenging type of smoker to use successfully.
While it is true that a charcoal smoker is less ‘plug and play’ than say, an electric smoker, with a little bit of know-how, you can produce amazingly-flavored, restaurant-quality food with minimal fuss.
What you’ll need
Before you can get smoking, you’ll need to make sure you have the basics in place. Smoking food isn’t a gear-heavy process, but some extra bits of equipment can make the process a lot easier.
A smoker
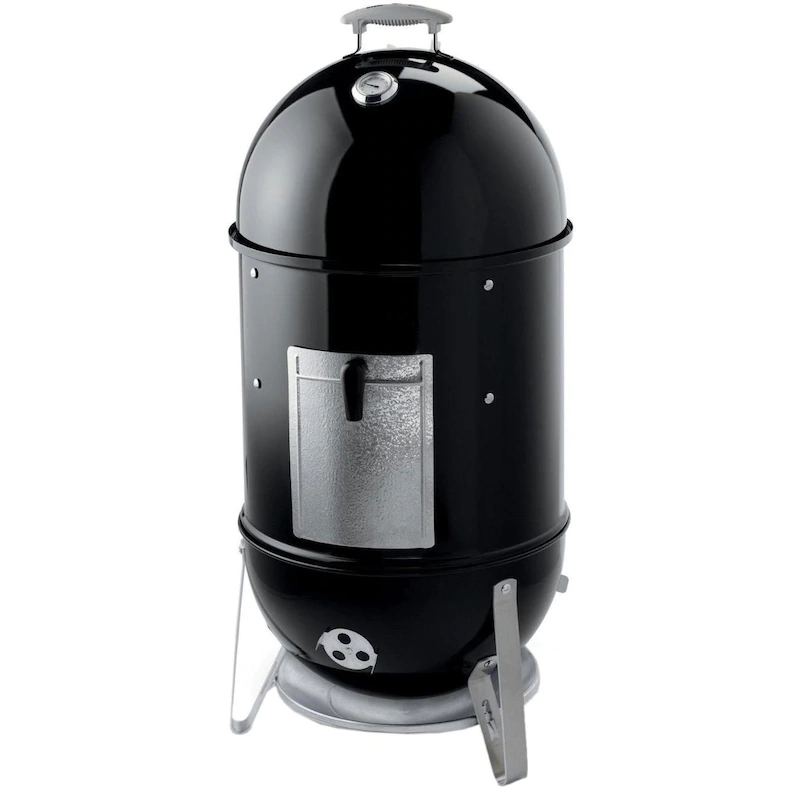
Unsurprisingly, the first thing you’re going to need to smoke with charcoal is a charcoal smoker. We’re big fans of the Weber Smokey Mountain.
This R2D2-looking upright pill of a smoker is versatile, well-made, comes in several different sizes to suit different space requirements, and, in a pinch, can be used as a grill by removing the central smoking chamber and cooking food directly over the firebox in the bottom.
- Beginner friendly
- Excellent smoke flavor
- Small footprint
- Reloading charcoal awkward
- Water pan can be a pain
Charcoal briquettes
Charcoal briquettes are going to be your primary fuel source. Generally, charcoal briquettes are used over lump charcoal because they burn more consistently. If you’re interested in a more detailed breakdown of the differences between lump charcoal and briquettes, we’ve done a deep dive into the matter.

Wood chunks
Your wood chunks will be what adds the majority of the delicious smokey flavor to your food.
Use wood chunks, not chips which will burn up too quickly. Don’t bother about soaking them either, that myth has been debunked.
Different woods have vastly different flavor profiles and some better suited to smoking than others.
As a rule, you want to use hardwood, rather than sappy softwood, which contains unpleasant-tasting terpenes. Woods like oak, hickory, and fruit woods like apple and cherry have a mild flavor and work with most foods. Mesquite and Pecan have much more robust flavors and will overpower milder foods.
If you’re looking to match your wood with the food you’re smoking, then grillinfools has a great breakdown of the flavors of different woods and what foods to pair them with.
Remember, not all woods are suitable for smoking, and some can have a very unpleasant taste or actually be poisonous. So it’s best to stick with wood chunks prepared specifically for smoking.

Charcoal chimney
A charcoal chimney is an excellent way to get your smoker started, and, as we explained in our article on how much charcoal you need to use, a chimney starter is an excellent way of measuring out your briquettes.

Firestarters and a lighter
While a chimney starter is a great way to get your charcoal started, it won’t actually light your coals for you. For that, you’ll need some firestarters and a lighter.
For the firestarters, we suggest a non-petroleum option. Lighter fluids and petroleum firestarters can taint your charcoal with an unpleasant chemical taste. Ideally, you’ll want to keep our fingers away from the fire, so it’s best to invest in a long-nosed bbq lighter.
Leave-in meat thermometer
A leave-in meat thermometer is vital to making sure that your food doesn’t overcook.
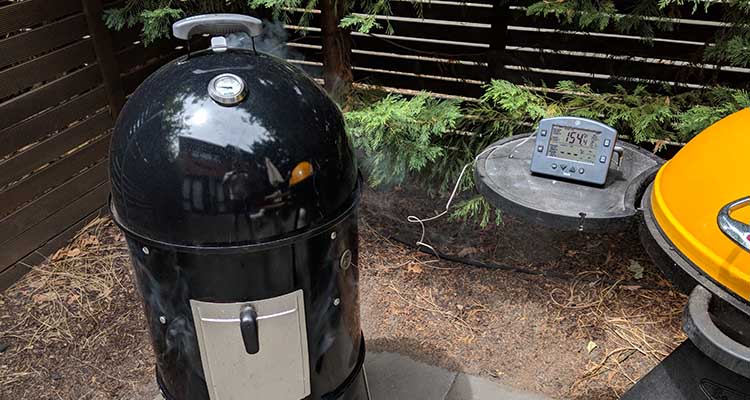
We suggest the ThermoWorks Smoke, a robust little unit that is able to measure both food and air temperatures while also being able to transmit data to a wireless handset up to 300 feet away. The Smoke is designed to track temperatures over an extended period and will sound an alarm if temperatures exceed or dip below set levels.
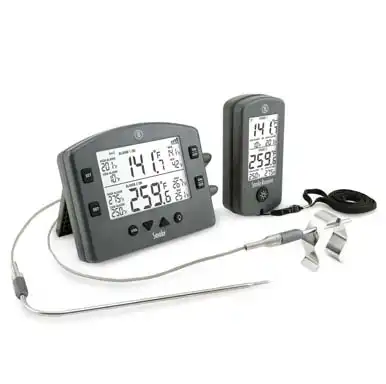
The outstanding build quality, user-friendly design, and the best in class probes make the Smoke our top pick for any serious smoking enthusiast.
Nice to have
While the items on the list above are non-negotiable, there are some other bits of kit that, while you can do without them, do make things more comfortable if you do have them.
Grill tongs
While smoking, food will need to be moved around or flipped over to ensure they have maximum exposure to the smoke.
Reaching a bare hand into a hot smoker is never a good idea, so it’s best to invest in a good pair of long-nosed tongs.

Extra long tongs keep your hands away from the heat while still feeling perfectly balanced in your hand.
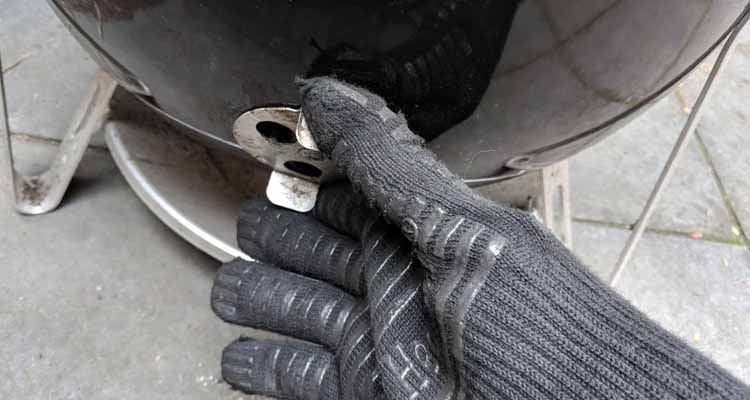
BBQ Gloves
In the interest of keeping your hands unburned, getting yourself a good pair of BBQ gloves is always a good idea. Unlike standard cooking mitts, BBQ gloves are rated to resist extreme heat, able to keep your hands safe from temperatures up to 932°F (500°C).
If you are looking for a good pair of BBQ gloves, then you’ll be happy to know that we’ve reviewed some of the best gloves on the market.
Get prepared before you start smoking
Proper preparation will make your first few smokes far less stressful.
Here are some prepping tips for you to consider:
Cleaning your smoker
Generally, you’ll want to run a dry burn in your smoker before you cook in it the first time. Running a dry burn helps to burn off any manufacturing grease, seasons your smoker, and allows you to get a feel for how much charcoal you’ll need to get your smoker up to temperature.
You also get a chance to practice temperature control without the risk of burning any food.
Once that’s done, you’ll need to clean your smoker before using it for your first cook. First, tip out any ashes and clean and empty the water pan. Make sure there isn’t any loose material or ash on the lid or cooking grates.
If the grates are dirty, brush them down with a grill brush and then wash them in soapy water.
Prepping your food
You’ll want to make sure that all the food you plan to smoke is prepared in advance. If you’re marinating, you’ll need to prepare the food in advance.
For some recipes, you can apply the rub right before firing up your smoker while others will benefit from sitting in the fridge overnight.
Arranging your cooking area
Just before you fire up your smoker, make sure your working area is clean and organized. Have your tools, charcoal, prepped food, wood chunks, and chimney starter close to hand. Since you’re setting things on fire, it’s always best to keep a fire extinguisher or hose nearby.
How to use a charcoal smoker (step by step guide)
At first glance, using a vertical water smoker like the
1. Disassemble your smoker
The first thing you’ll want to do is disassemble your smoker and set up the base where you’ll be doing your smoking. Ensure the base is steady and won’t rock when the rest of the smoker is fitted on top.
Place the charcoal ring in the base of your smoker. Then add the amount of charcoal you need. This amount will vary depending on how long you want to smoke for.
To fire up your smoker, we suggest using the Minion Method to regulate temperature and ensure a consistent burn time.
To use the Minion Method, first light 5-10 of your charcoal briquettes in your chimney starter. Once all the coals are covered with grey ash, place them on top of your other, unlit, coals.

As this first set of coals burns out, they will set light to the briquettes around them.
This constant low burn keeps the smoker’s temperature controlled and removes the need to refuel your smoker, even if you’re smoking for up to 18 hours.
3. Add wood chunks
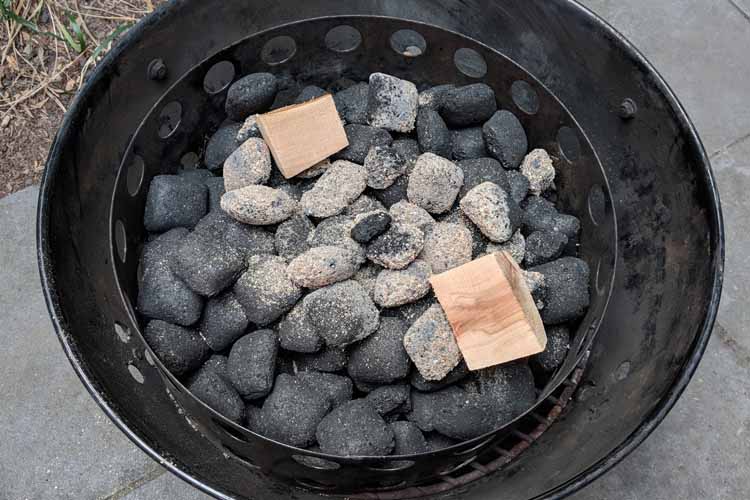
Place your wood chunks on top of your charcoal. There’s no need to soak your chunks.
Pit Master Harry Soo uses a slightly different technique and lays the wood chunks at the bottom before pouring the unlit charcoal over the top.
It’s definitely something to experiment with.
Wrap your water pan in foil to make clean up easier, fill it with water and place it in your smoker.
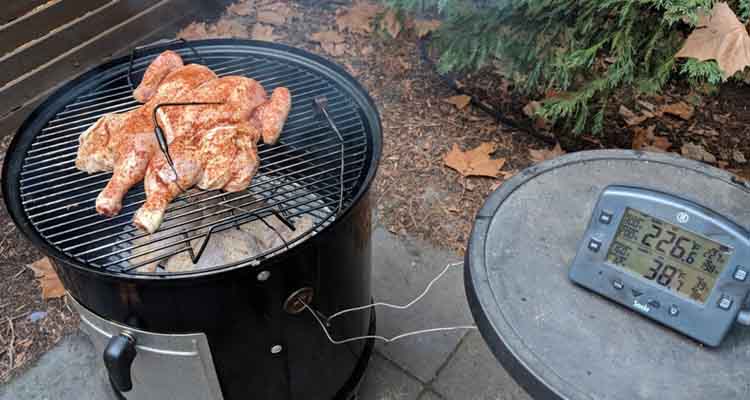
4. Reassemble your smoker and add food
Put your grill grates into your smoker and your food on top of them. This is where you use your leave-in meat thermometer to track your food’s temperature and the smoker’s interior.
The final step is to replace the lid and then use your vents to fine-tune the smoker’s temperature.
How to control temperature on a charcoal smoker
Temperature control is one of the more difficult parts of using a charcoal smoker and is part of why they have developed a reputation for being difficult to manage.
However, what it boils down to is you need a little more know-how to create a consistent temperature.
Thankfully, we have a full article that shows you exactly how to control the temperature of your charcoal smoker. While this article will go into the nitty-gritty of how to fine-tune your smoker’s internal temperature, the primary method is to use the intake and exhaust vents to control the airflow.
The intake vent is generally at the base of your smoker, nearest the charcoal, and it controls the amount of air the burning coals have access to. Open the vent, and the coals burn hotter, close it, and the fire will quickly go out.
The exhaust vent allows smoke and gasses to escape your smoker. If you close your exhaust vent, CO2 will build up and eventually smother your charcoal.
The intake vent is the main method of controlling your smoker’s temperature by changing the amount of air that is flowing into the smoker.
Just remember, it’s easy to overshoot when adjusting your temperature. Changes in airflow take time to take effect, so make very slight changes and then wait for the changes to take effect by monitoring your thermometer.
Turn your charcoal smoker into a ‘set it and forget it’ cooker
If you follow the steps in this guide you should get great results cooking with charcoal without too much trial and error.
But sometimes you need to leave the house for a few hours, or the weather is bad and you don’t want to go outside to keep checking your smoker.
This is when an automatic temperature controller can be a life saver.
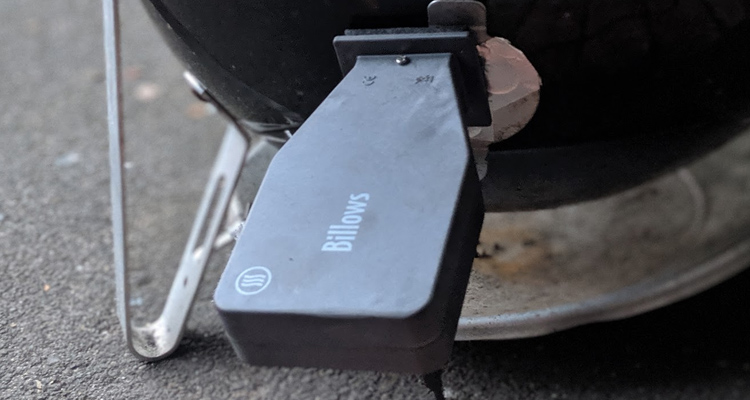
There are a few different companies making these products. Essentially you get a fan that connects to the intake vent of your smoker. The fan connects to a control unit which is essentially a smart thermometer so you can also monitor the temperature of your food from the same device.
How long do you need to cook for?
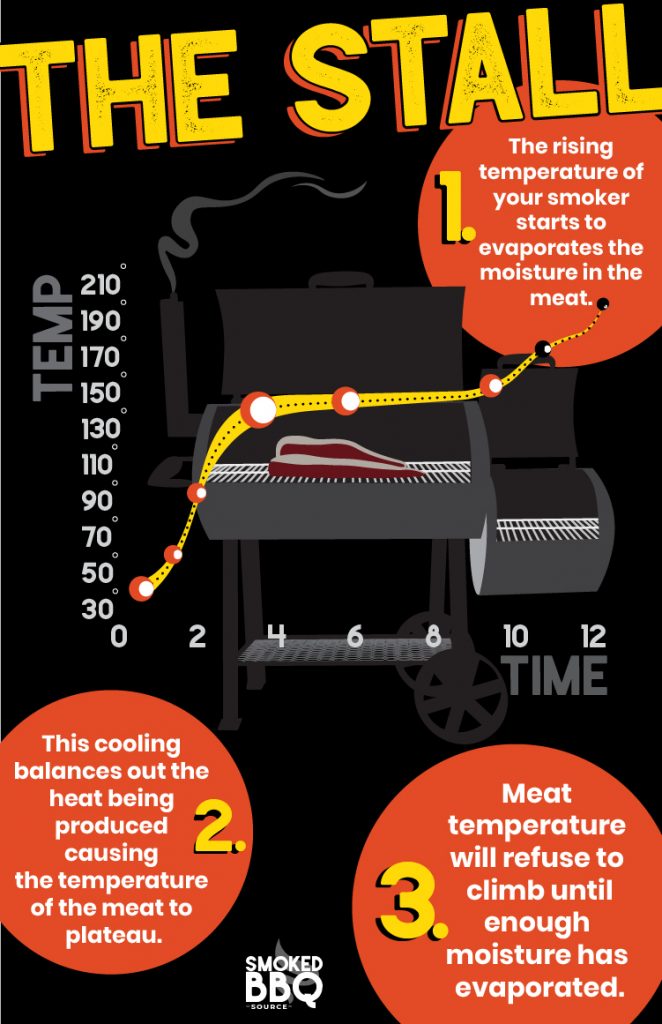
Unlike a more conventional recipe, smoking guides will often state that a particular food needs to be cooked to a specific temperature, rather than for a set amount of time.
While there are some generic smoking times and temperatures charts, there should only be used as a rough guide.
Don’t panic if your temperature “stalls” either. This is perfectly normal.
Once again, your thermometer will be your best friend here. The meat probe should be inserted into your food without coming into contact with any bones.
The external temperature probe needs to be around an inch from the food, on, but not touching, the cooking grate.
The reason you need to cook with temperatures rather than time is that there are a large number of variables that can influence your smoker.
These include the ambient temperature, the design of your smoker, the quality of its construction, or even if your smoker is in direct sunlight or not.
Wrapping it all up
As you can see, smoking with charcoal isn’t an incredibly difficult process. It just requires a little understanding of how a charcoal smoker works, how it starts, and how to adjust its temperature to create a consistent food-smoking machine.
With this step by step guide and the other articles we’ve linked, you should be smoking amazing food, complete with that authentic charcoal tang, in no time.
If you’ve got any tips for charcoal smoking or how to control a charcoal smoker’s temperature, we’d love to hear about it in the comments section below.