
How to Reverse Sear Filet Mignon

SmokedBBQSource is supported by its readers. We may earn an affiliate commission at no extra cost to you if you buy through a link on this page. Learn more.
Filet mignons are a special treat, which makes it a perfect steak for your Holiday dinner.
Follow along as we walk through how to break down a whole tenderloin and then a step by step guide of how to reverse sear filet mignon so that it’s perfectly cooked just in time for dinner.
Reverse seared Filet Mignon from a whole beef tenderloin
You can keep the beef tenderloin whole and smoke it, which is a great option around the holiday. But when you want steaks, buying a whole beef tenderloin and breaking it down yourself is a great way to save money upfront, and you can also customize the thickness of the filet.
Ingredients you’ll need
- Beef tenderloin – typically ranges between 5-6 lbs and is cheaper per pound than filet mignons. If you decide not to cut your own filet mignons, that’s all good.
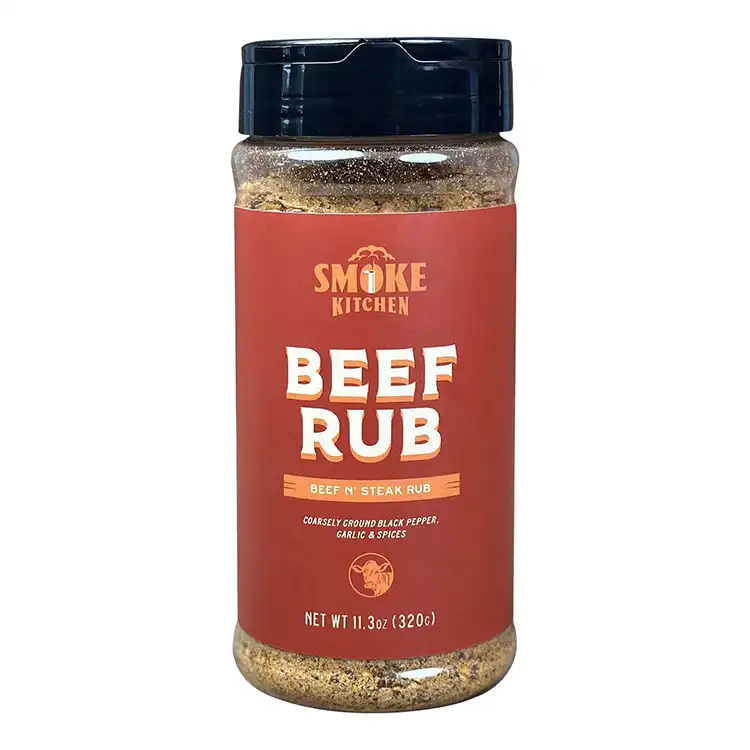
- Beef Rub – Store bought or try our homemade recipe.
- Salt
- Compound butter – butter, parsley, roasted garlic, lemon zest, lemon juice, and salt.
Equipment you’ll need
- Trimming knife
- Butchers Twine
- Smoker – for the reverse sear.
- Grill – to get a good sear, we need a grill that can get over 500°. Charcoal is my preferred method, but a gas grill, griddle, or cast iron skillet can do the trick.
- Wire rack – a wire rack will help air circulate around our filet mignon when dry brining. This will ensure an even brine, resulting in maximum flavor.
- Thermometer – using a thermometer probe, we can monitor the internal temperature throughout the cook, resulting in a perfectly cooked steak
Why the the reverse sear is the best method for Filet Mignon
When you traditionally sear a steak, whether on a grill or cast iron pan, you give a hard sear on both sides of the steak and then bring up the internal temperature to your desired doneness.
Reverse searing is the opposite of that. We’re going to slowly bring up the internal temperature of our steak on a smoker and then give it a hard sear to finish.
By reverse searing, we’re able to monitor the internal temperatures more easily, resulting in a perfectly cooked steak.
Because we’re slowly cooking the steak as well, the inside will be wall-to-wall pink (if cooking medium rare to medium), which makes for a great presentation.
How to butcher a whole beef tenderloin

Before you start cutting your beef tenderloin and slicing it into filet mignons, there are a few key steps:
Remove the tenderloin from the packaging, patting it completely dry. This will make it safer when cutting and make it easier to identify different sections of the tenderloin.
Identify the chain of the tenderloin. Looking at the tenderloin, you will see a tapered end and a thicker end. Along the side is a small chain-like strip that is loosely attached to the main section of beef. Starting at the tapered end, start to pull the chain away from the main portion of beef. If you need to, use the tip of a trimming knife to help cut through any tricky parts.


Remove the silver skin. Insert the tip of your trimming knife under the silver skin and gently cut side to side, removing as much silver skin and as little meat as possible. Go ahead and trim up any excess fat as well.
To cut filet mignons from the tenderloin, we’re going to first remove the thicker and taper ends, leaving the center cut of the tenderloin. This is the meat we’re going to use to cut filets.

You can cut your filets as thick or as small as you like. Personally, I like 2” filets. It’s a thick cut of beef and makes for a pretty presentation once cooked.
Slice the center cut of the tenderloin into 2” filets, making sure your cuts are straight for aesthetic purposes.
I also tie each filet with butcher’s twine to help keep them uniform while cooking.

How to dry brine filets
To make the filets extra tender, you want to dry brine them. This simply means we’re going to salt the outside of our steaks and let them sit uncovered in the fridge for one to two days.
This will allow for salt to penetrate through the steaks which will help add flavor throughout the entire streak and help tenderize the meat.
It also helps dry the outside of the filets, which will result in a better crust when searing.
The rule of thumb when dry brining steaks is ½ tsp per pound of meat. For a 6 lb beef tenderloin, I used 3 tsp of salt to brine the filets.

Salt the top and bottom of each filet (you can salt the sides with any remaining salt) and place the filets on a wire rack on top of a baking sheet.
Let your steaks rest in the fridge for one to two days uncovered. I typically do one day, but, if you have the time, two days will really maximize the dry brining effect.
Garlic and herb compound butter

I recommend you make the compound butter the day before or at least the morning of. Just so it has time to harden up, and it’s easy to slice.

Place softened butter, chopped parsley, roasted garlic, lemon zest, lemon juice, and salt in a bowl. Mix everything thoroughly and then wrap tightly in plastic wrap to create an even log shape.

Place it in the fridge to harden, and that’s it! It’ll be ready by the next day to slice and top your steaks with.
How to Reverse Sear Filet Mignon
1. Season
Remove the filets from the fridge and let them come up to room temperature. About one hour.
Because we have already added salt, there isn’t much we need to do. You could place these on the smoker with just salt or add some black pepper, but I like to use Smoke Kitchen’s Beef Rub to season it up and add a little bit of extra flavor like garlic and onion.

I like to season my steaks 15 minutes before placing them on the grill to allow for the rub to set.
2. Fire up the smoker
Preheat your smoker to 250°F.
3. Reverse Sear
Once your steaks have come up to room temp, go ahead and place them on the smoker.

I use a probe thermometer like a Meater + to help monitor the internal temperatures while cooking.
Based on experience, it should take about 40-50 minutes for your steaks to reach an internal temperature of 115°F.

4. Sear
While the steaks are on the smoker, go ahead and preheat your grill to 500°F.
We’re going to sear our steaks over high heat to build a crust, and it’s best to have your grill ready once your steaks reach 115°F.
Once the steaks hit 115°F, pat the top and bottom of the filets with a paper towel to remove any moisture.
Immediately, place the filets on the grill and sear until an internal temperature of 125°F.
I flip my steaks every 30 seconds, which will prevent overcooking the inside of the steak while building the crust from the sear.

Once your steak hits 125°F, pull it off the grill and let it rest for 15-20 minutes before serving.
I like to add ½ tbsp of compound butter on top of the steaks, while they rest.
Make sure to clip the butcher’s twine and remove it before serving. Any extra compound butter can be served on the side for good measure.

Some other cuts of steak you might like to grill
- Juicy Smoked Flank Steak
- How to Grill a Delmonico Steak
- Grilled Rump Cap
- Coffee Crusted Ribeye
- The Best Smoked Tri-Tip

How to Reverse Sear Filet Mignon
Ingredients
- 6 lb whole beef tenderloin
- 3 tsp salt
- 3 tsp Smoke Kitchen Beef Rub - or beef rub of your choice
Compound butter (best made earlier)
- 1 cup softened butter
- 3 tbsp fresh parsley - rough chop
- 1 head roasted garlic
- 1 lemon - zest + 2 tbsp juice
- salt - to taste
Instructions
- Butcher a whole tenderloin into 2” filets.
- Tie each tenderloin around the middle with butcher’s twine.
- Season each tenderloin top and bottom with ½ tsp salt.
- Place tenderloins uncovered on a wire rack in the fridge for 1-2 days.
- Remove tenderloins from the fridge and let them come up to room temp.
- Preheat the smoker to 250°F.
- Season filets with beef rub.
- Place filets on the smoker.
- While filets cook, preheat a charcoal grill to 500°F.
- Once filets hit an internal temperature of 115°F, remove them from the smoker.
- Immediately place them on the grill, flipping every 30 seconds until an internal temperature of 125°F.
- Remove from the grill, adding ½ tbsp compound butter to the top.
- Let steaks rest for 15-20 minutes before serving.
Compound butter (best made earlier)
- Place all the ingredients in a bowl and mix them thoroughly.
- Spread the mixture onto plastic wrap, wrap it tightly in the shape of a log, and place it in the fridge overnight to harden.
Notes
Equipment
Nutrition
Nutrition information is automatically calculated and should be used as an approximation only. If you’re worried you could always add a side of kale.
What do you use the thicker and taper ends of the beef tenderloin for after making the filet mignons?
You could slice into thin strip and use in a stir fry, or if you grind your own meat for burgers you could add to a burger blend.