
13 Ways to Make Better Chili

SmokedBBQSource is supported by its readers. We may earn an affiliate commission at no extra cost to you if you buy through a link on this page. Learn more.
Great chili doesn’t just happen. It’s built one flavor-packed layer at a time.
Whether you’re a Texas purist or someone who piles on the toppings, these tips will help you take your pot of chili to the next level. From choosing the right meat to dialing in smoky depth, we’re covering everything that turns a decent bowl into something unforgettable.
1. Make your own chili powder
Store-bought chili powder is convenient, but if you are looking to wow people with your chili’s depth of flavor, there is no replacement for a homemade mix.
Making your own chili powder gives you a richer, deeper flavor than tubs of powder that could have been sitting on a shelf for months or even years.
You can also tailor your chili powder by using a proprietary mix of chili peppers. You’ll get a better flavor if you use a blend than if you stick to one chili pepper.
The most common chile pepper choices are ancho chilies and guajillo chilies, but if you want a little more kick, you could throw in some cascabel chilies or even some arbols. Try not to get too high on the Scoville scale through, or you’ll knock the complexity out of your dish.
2. Try smoking your chili ‘over the top’

“Over the Top” (OTT) chili has taken the BBQ world by storm, and for good reason.
This method flips traditional chili-making on its head by smoking a seasoned ground beef above the chili base. As the meat slowly smokes, its juices drip into the pot below, layering in deep, smoky flavor while developing a crave-worthy bark on the outside.
It’s dramatic, it’s flavorful, and it brings serious pitmaster energy to a comfort food classic.
Our Smoked Over the Top Chili recipe shows you how it’s done.
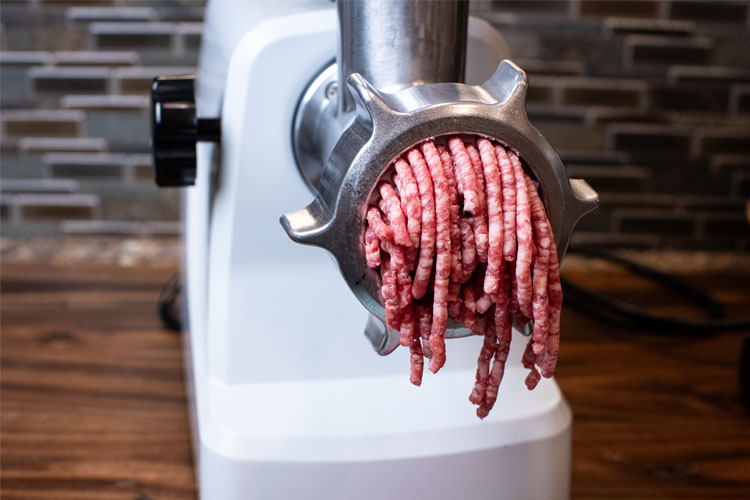
3. Grind your own chili beef
It’s pretty well known that standard ground beef isn’t the best quality meat you can buy. One easy way to fix that is to grind your own.
You will need a meat grinder for this, but they aren’t expensive, and many mixers have a meat grinder attachment. Make sure to get one that allows you to vary the fineness of the grind. A food mixer attachment words, or grab a dedicated grinder if you think you’ll be doing a lot of grinding.
With your grinder in hand, you’ll need to choose your meat. Cheaper cuts of meat work well for home grinding, so don’t be throwing ribeye into your mincer. Flank or chuck works great as long as you stick to the magic 80/20 ratio of meat to fat.
To keep your meat from gumming up the grinder:
- Cut the meat into 1-to-2-inch slices and then lay it flat on a baking sheet and put it in the freezer for about 40 minutes. This will help to keep the meat moving through the grinder.
- After 40 or so minutes, take the meat from the freezer and feed it piece by piece into the grinder. Remember to use the pressing attachment to push the meat down and keep it moving through the blades.
Grinding your own meat gives you control over a host of factors, from the quality of the beef to the fat ratios, and even the texture of the finished product.

The STX-3000 can chew through tough cuts of meat and can handle both fine or coarse grinds easily. The included attachments make this grinder especially versatile.
4. Alternatively, ditch ground and use cubed beef

If you like the idea of using better meat, but don’t want to go to all the trouble of grinding your own, you could always opt for a cubed beef chunky chili.
If you are going to use cubed beef, bear in mind that you will need to cook your chili for longer than if you were using ground beef.
Some cuts of beef you might want to consider using in your chili are:
Beef chuck
Beef chuck comes from the shoulder of the cow and, while it is a relatively tough chunk of meat, you do get a lot for your money. Cut your chuck into 1-inch cubes and stew in with the rest of your chili for about 90 minutes until it is tender.
Brisket
More commonly used for smoking or roasting, the brisket is taken from the hard-working muscles of the cow’s chest and can be very tough. To overcome that, you’ll need to stew it on low heat for at least two hours. Once it is cooked properly, however, it will pull apart into mouth-watering shreds.
Or use leftover smoked brisket as we do in our smoked brisket chili.
Short ribs
Short ribs are often served whole, but they don’t have to be. Get yourself a decent rack of chuck short ribs, cut the meat off the bones, dice it up and throw it into your chili. You can also grill or BBQ your rack of ribs first before adding it to your chili.
5. Swap chili powder for the real thing
If you want to avoid the grittiness of powdered chiles, you can instead create your own chili paste by toasting your chili pepper mix, cooking them in some homemade stock, and then puréeing them into a smooth paste.
The trick to creating a great chili paste is to bring together chili peppers that hit the four important flavor notes of a great chili, sweet, hot, smokey, and fruity.
For example, you might use choricero peppers for a touch of sweetness, arbols for heat, smoked jalapeños (chipotles) for a smokey depth, and pasillas or anchos to give the mix a fruity vibrancy.
6. Toast and grind your own spices
Once your chili powder or paste is done, we’re going to apply the same “homemade is best” ideal to all the rest of the dry ingredients, which means toasting and grinding your own spices.
Pretty much everyone has their own spice mix that goes into their chili, but cumin and coriander are common ingredients and are easy to grind yourself.
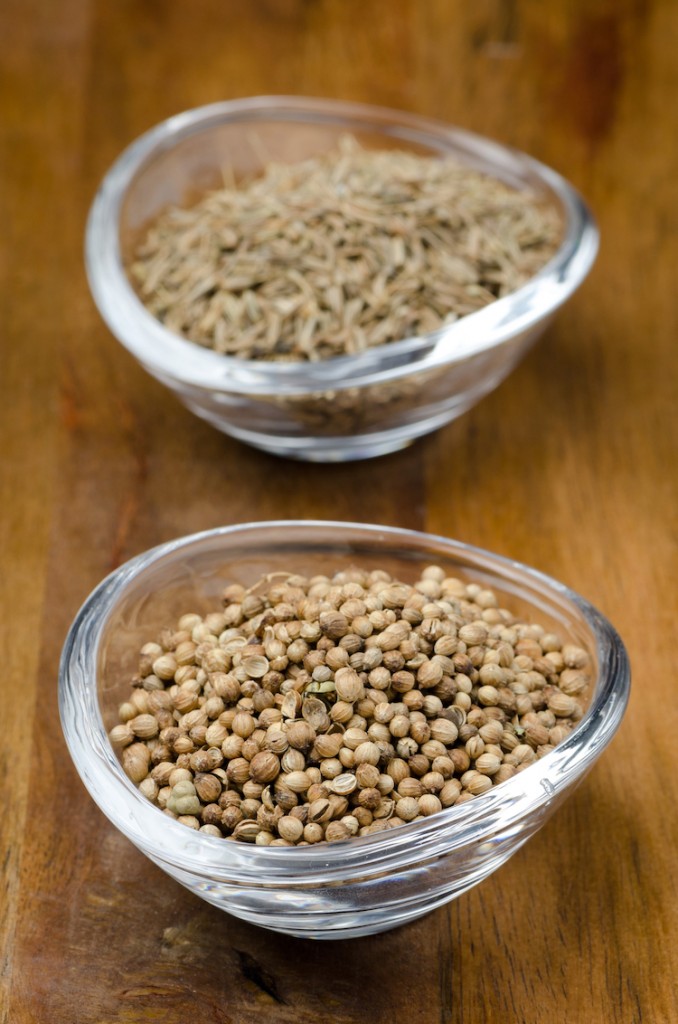
- Find the freshest cumin and coriander seeds you can and place them, separately, in a flat bottomed pan over medium heat.
- Stir them gently with a wooden spoon to stop any charring and take them off the heat when you can clearly smell their fragrance. You should also be able to hear them fairly popping and crackling.
- Place your toasted seeds in a mortar and pestle, fine coffee grinder or spice grinder and grind until fine.
- Store your newly ground spices in airtight containers and try to use them within 6 months.
You might not do this for a standard Thursday night chili, but if you are having guests over the extra vibrant taste of your own home-ground spices will make it worth the effort.
7. Cut your vegetables into even pieces
You want all the ingredients in your chili to cook at the same time, which is why it is important that you take a little extra time to cut them into consistently sized portions. The last thing you want is to come across a chunk of uncooked vegetables.
8. Always pre-brine dry beans
If you are using dried beans in your chili, you’ll get the best results from the if you brine them for about 8 to 24 hours beforehand.
It’s a simple technique:
- Dissolve 3 tablespoons of salt into 4 quarts of cold water per pound of dried beans.
- Let the beans sit in the brine for 8 to 24 hours.
If you want to speed the process up, you can add a pinch of baking soda. You want to go lightly with the baking soda, or your chili will have a soapy aftertaste.
9. Cook low and slow
Low and slow is an excellent cooking method to pull out the complexity of your spices and chili peppers and combine them with the rich flavor of the beef.
It’s also a convenient way to cook a mouthwatering chili, especially if you have a slow cooker or crockpot. Simply add all your ingredients, set the slow cooker to low, and come back in 8 or so hours for some spicy chili delight.
Chili cooked in the slow cooker can sometimes be a little watery. If that is the case, take some of the vegetables and beans out of the chili. Puree them and add them back in so their starch can thicken the mix. You can also do this with ground-up tortilla chips.
If you don’t have a slow cooker, you can cook low and slow on the hob, but it’s best to do that on a day when you can wander into the kitchen every now and then to make sure your chili isn’t catching on the bottom of the pan.
10. Swap water for beer
Adding beer to your chili instead of water can give it real depth and character. You’ll want to pick a beer that has the same bold flavors and richness as your chili, so Bud isn’t going to cut it. You’ll also want something with low carbonation, so opt for a malty ale or a chocolate stout.
11. Make your own stock
Nothing improves a dish faster than homemade stock. All you’ll need is beef bones saved from other meals or sourced from you butcher, vegetables like leeks carrots, and celery, and a large bouquet garni of parsley, sage, and thyme.
You can tailor your stock to your own tastes, but Diana over at The Spruce Eats has a pretty solid recipe to get you started.
12. Try adding coffee and chocolate
The primary flavors of chili are distinctly South and Central American, so it shouldn’t be a surprise that they pair well with other flavors from those areas.
Adding in around a cup of strongly brewed Colombian coffee or a few teaspoons of very finely ground espresso adds an earthy note to your chili that you’ll wonder how you did without.
A few squares of 80-90% cocoa solids dark chocolate, or a few teaspoons of unsweetened cocoa powder does much the same, but with a hint of sweetness to it.
13. Don’t skimp on the toppings
Chili without toppings is like fries without ketchup. A combo of freshly made guacamole, Monterey or Pepper Jack cheese, sour cream, tortilla chips, and jalapenos can turn a great chili into something truly amazing.
Try not to think of the toppings as an afterthought. Instead, think of them as essential ingredients in the whole chili experience.
Topping it all off
Making a genuinely amazing chili doesn’t have to mean a lot of extra hard work, it just means refining the way to approach cooking it and the ingredients you use.
By implementing our tips above, you can raise your chili game to legendary, just be prepared to spend a lot of time cooking it for your family and friends.
Do you have the perfect chili paste recipe? Perhaps there’s a vital chili ingredient you think should be in every bowl? We’d love it if you’d let us know in the comments below.

About Your Pitmaster
Joe Clements is the founder and editor-in-chief of Smoked BBQ Source, a leading barbecue resource that has helped tens of millions master grilling and smoking. Growing up in a vegetarian household, his love for barbecue was unexpected. Determined to master the craft, he launched Smoked BBQ Source in 2016 to document his journey from amateur to pitmaster.
Joe leads a team of expert barbecue creators and oversees the largest collection of in-depth grill reviews and a library of tested, foolproof recipes. Whether he’s firing up a pellet grill or charcoal kettle, he’s passionate about making barbecue approachable and enjoyable for all.
Chili doesn’t come from Mexico. It originated in San Antonio de Bexar in the 1730s, in current day Texas. This was before Mexico even existed as a country.
Also. Chili doesn’t have beans. Or tomatoes. Or chocolate. Or coffee.
This dish may be wonderful, but it isn’t Texas Red.
I live in sealy TX. I have been in tx. Foe 45 years . I live chile . I have made it with just about everything you can imagine and I have made and bought Texas red. I haven’t found any that is any good. If you have a recipie that is good please send it to me and I will try it again. I just haven’t found a good one .
Thanks
Chuck Chandler
This sounds great and I’d love to try making it. I’m new to this so it would be great if you’d give some idea of amounts or ratios. Please finish your fine article on “Ways to Make Chili Better” for those of us that are new to this.
Thank you