
Smoked Spatchcock Turkey

SmokedBBQSource is supported by its readers. We may earn an affiliate commission at no extra cost to you if you buy through a link on this page. Learn more.
Smoking a whole turkey can be frustrating. The breast dries out and the skin won’t crisp. If you want a steady, predictable way to get a juicy turkey without the stress, this method is the one I trust for Thanksgiving.
Why this is my go-to method for smoked turkey
Over the years I’ve tested this recipe every way you can think of: wet brines, injections, high heat, low heat, binders, and every variation of seasoning. Each year I’ve stripped away the steps that didn’t make a meaningful difference and kept the ones that consistently delivered a juicy turkey with crispy skin.
Here’s why it’s become my go-to method:
- Simpler carving especially if you remove the keel bone and ribs
- Faster cook time because there’s no deep cavity to heat through
- More even cooking so the breast and legs finish closer together
- Better browning thanks to the extra surface area and dry skin
- Easier seasoning since everything sits flat and accessible
It doesn’t look like the classic holiday-table turkey, but the results are better and the process is far less stressful. Most of the work happens the day before when you spatchcock and dry brine. On cook day you only need to season, smoke, baste, rest, and carve.
If you want to stay organised, you can also prep the turkey rub and gravy tray the night.
Supplies you’ll need
- A fresh or thawed turkey – Allow 24 hours in the fridge for every 4 pounds, so a 12-pound turkey will take 3 full days to thaw properly.
- Smoking wood – Apple or cherry both work great, check out our post on the best woods for smoking turkey for the full list.
- Poultry shears or a sharp knife – Makes it much easier to spatchcock the turkey.
- Drip pan for gravy – Even if you’re not making gravy, you’ll want a pan to catch the dripping to keep everything clean.
- Meat thermometer – A dual probe remote thermometer like the Smoke is best so you can see exactly when the turkey breast hits 160°F.
Choosing a turkey
Smaller turkeys cook faster, more evenly, and hold on to more moisture, so you get better flavor and a juicier finished bird.
The ideal size for smoking and spatchcocking is 10 to 14 pounds. A simple rule is to plan on one pound of turkey per adult, so if you need more meat, you’re better off smoking two medium birds instead of forcing a huge one into your smoker.
When you’re shopping, check the labeling. Terms like “basted,” “self-basted,” and “Kosher” mean the turkey has been injected with a salt solution. These options aren’t unsafe, but they give you less control over seasoning. For this recipe, a natural, unenhanced turkey works best because it allows the dry brine and rub to do their job without over-salting.
Day before prep
I like to spatchcock and brine the turkey the day before I plan on smoking, although you could go as far as 36 hours before.
1. Spatchcock the turkey
Place the turkey breast side down on a clean cutting board.
Start at the neck end and cut along one side of the backbone using sturdy poultry shears.

Take your time. If you meet heavy resistance, stop and cut from the other end. Repeat on the other side to remove the backbone.
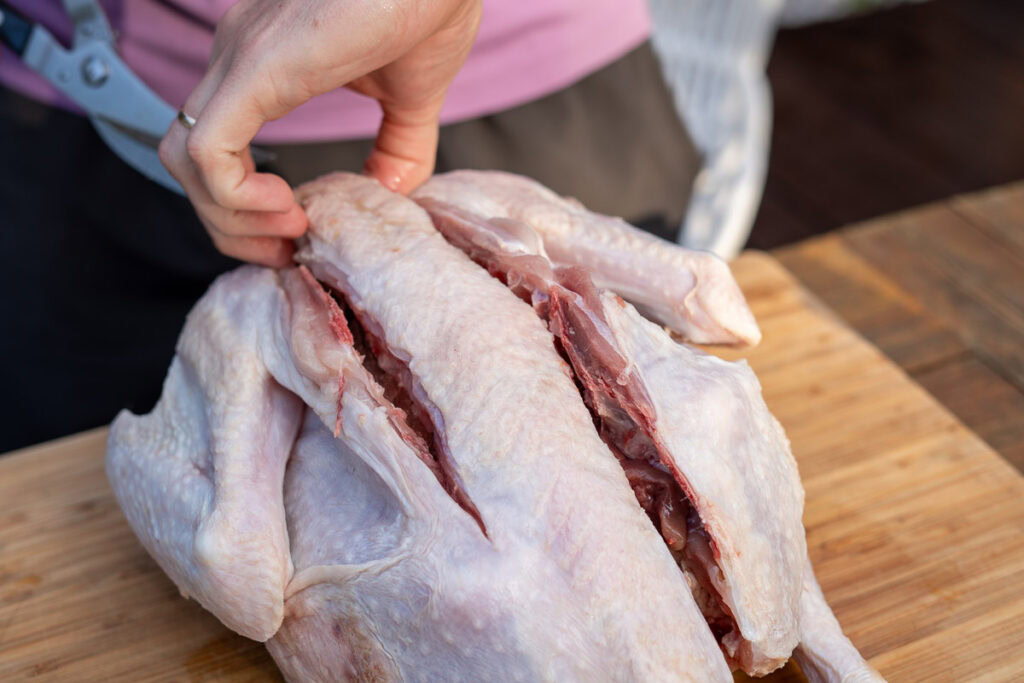
Save the backbone for gravy.
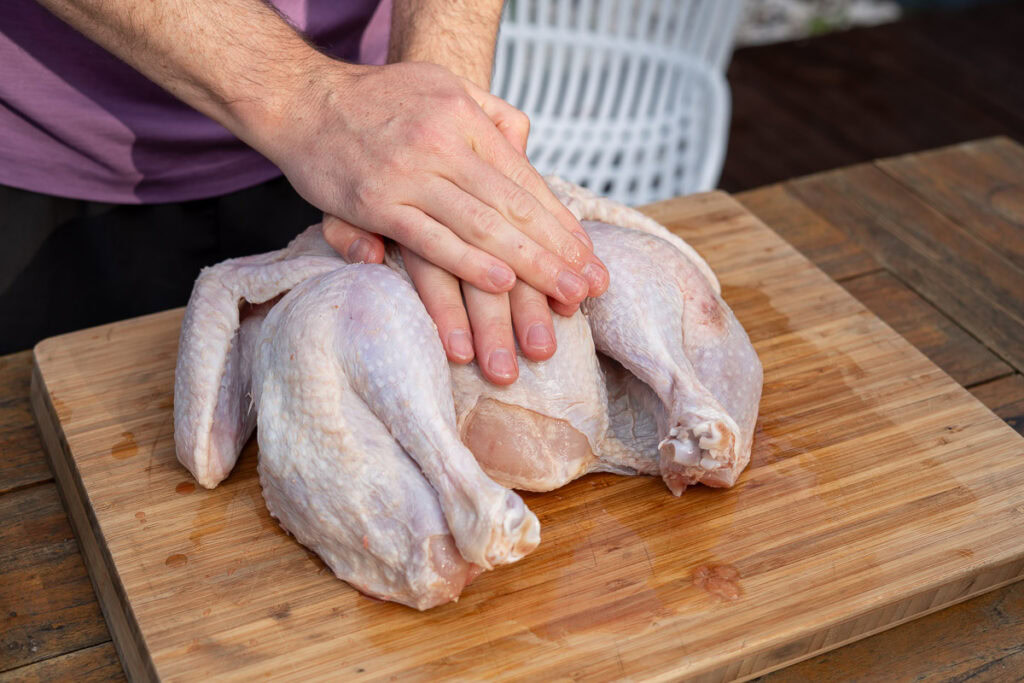
Flip the turkey over. Make a small cut at the top of the breastbone, then press firmly with both hands until the breastbone cracks and the bird lies flat.
Optional: Remove the keel bone and rib cage
You can also take out the keel bone (wishbone) and the small rib cage bones. Removing these lets the turkey sit flatter on the grill and exposes more meat for seasoning. It also makes carving quicker because you can lift each breast off in one clean piece.
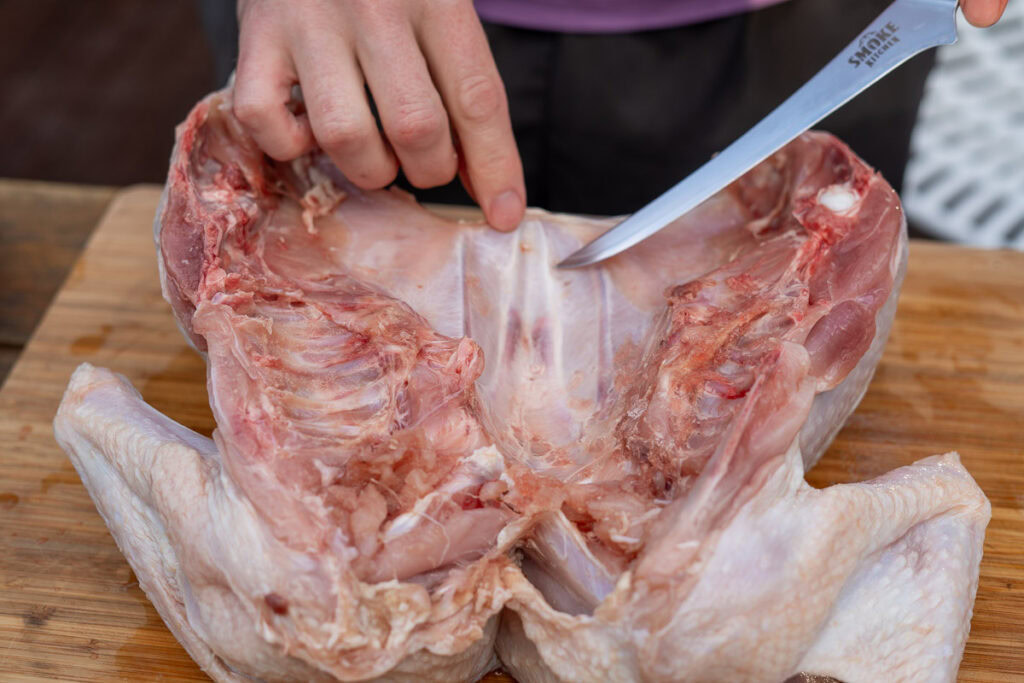
This step is a bit fiddly and not essential. Most people skip it. I don’t usually bother either, but I did it here because it makes the final slicing much easier.
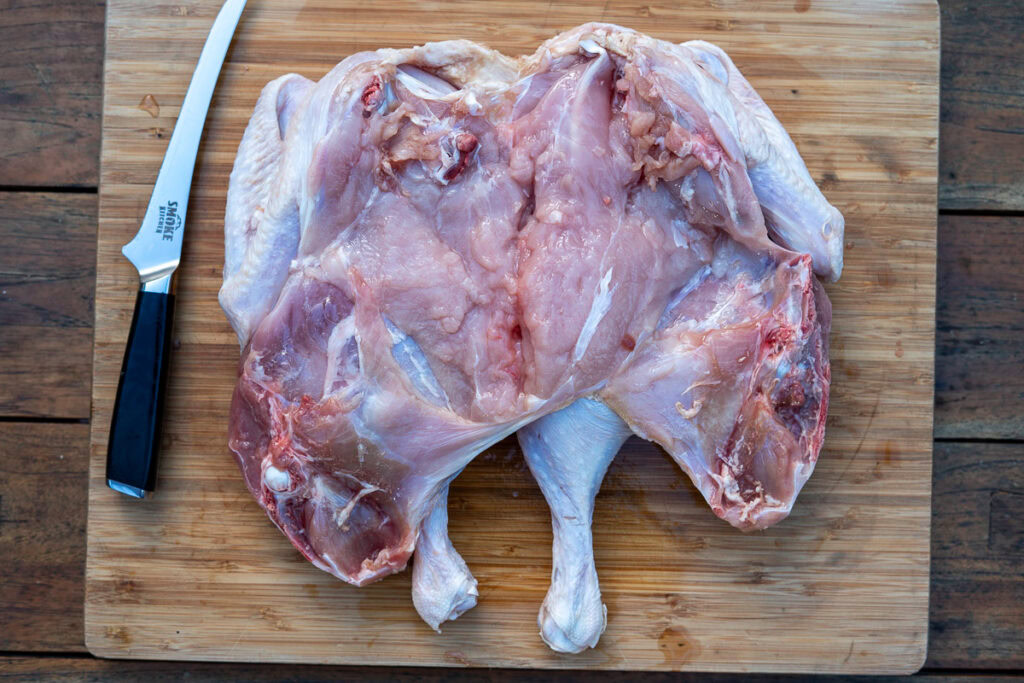
Trim any loose skin or excess fat around the cavity. Wear gloves if you prefer. The small bones in the area around the backbone can be sharp.
Finish by flipping the turkey breast-side up. If you didn’t remove the keel bone, press down in the centre of the breast until it cracks and the bird lies flat. It feels a bit like doing chest compressions on a turkey, but it works
2. Dry brine the turkey
Brining is a great way to keep turkey juicy. A wet brine works well and I use it in our whole smoked turkey recipe, but for a spatchcocked bird on the smoker a dry brine is the simpler choice. It seasons the meat, helps the skin dry out, and suits the flatter shape of a spatchcocked turkey.
Avoiding Rubbery Skin: Rubbery skin usually comes from starting with too much surface moisture and running the cook too low.
A long wet brine loads the skin with extra liquid, and that moisture fights you the whole way. Even if you pat the turkey dry, the skin still struggles to tighten during the cook.
A dry brine avoids this by pulling moisture out and giving the skin time to air-dry overnight. That sets you up for cleaner browning and makes it easier for the heat to do its job. If you want even more help, you can start the turkey a little hotter, around 350 to 375°F, to render the skin before the meat finishes.
To dry brine turkey, pat it dry and measure out about ¾ teaspoon of kosher salt per pound. For a 10-pound bird, this works out to roughly 2 to 2.5 tbsp.
For Extra Crispy Skin: Mix the salt with a teaspoon of baking powder. It’s a trick I picked up from smoking chicken wings to help the skin dry out and crisp up, and it works just as well on a turkey.
Sprinkle half of the mixture over the underside of the bird, then flip it and season the skin side with the rest.
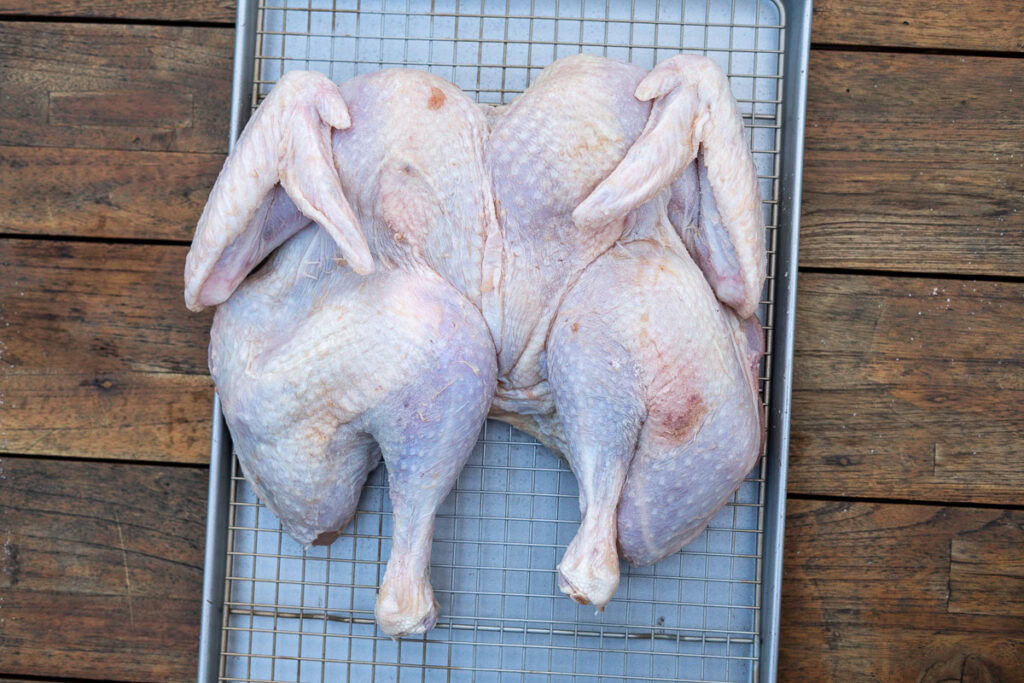
Set the turkey on a rack over a tray and refrigerate it uncovered for 24 to 36 hours. Leaving it uncovered dries the skin out, which helps it brown evenly and smoke cleanly.
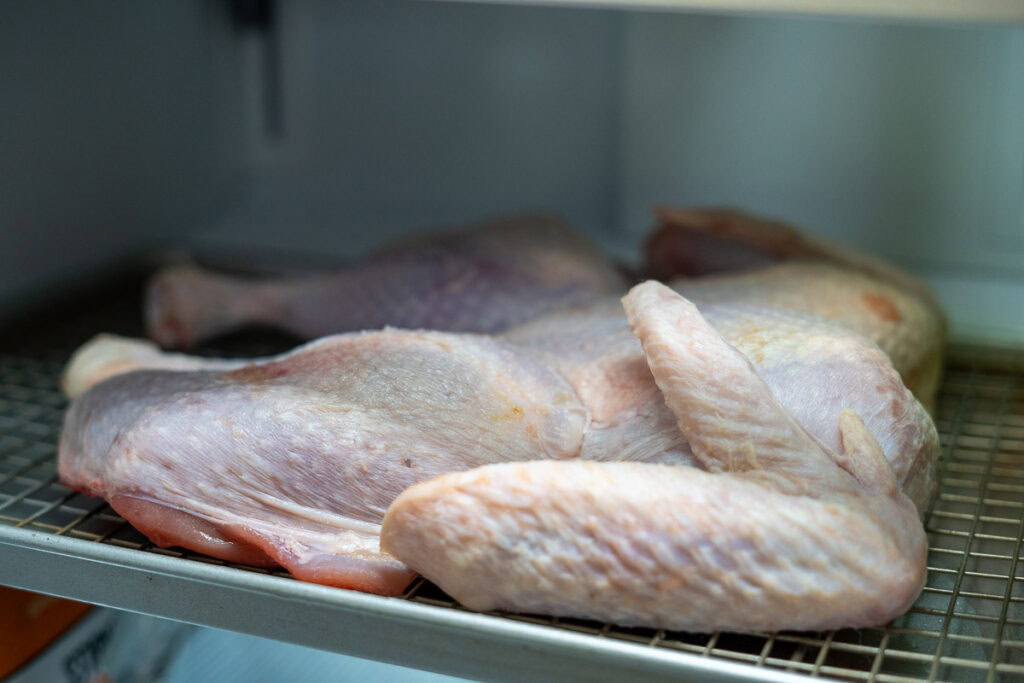
On cook day, don’t rinse the turkey. Rinsing puts moisture straight back onto the skin and undoes the drying you achieved overnight.
The skin should look dry and slightly tacky, with a dull finish rather than shiny or wet. Pat it dry once more, especially if any liquid has pooled anywhere on the turkey.
Once the dry brine is done, you’re ready to season the turkey and fire up the smoker.
How to smoke a Spatchcock Turkey
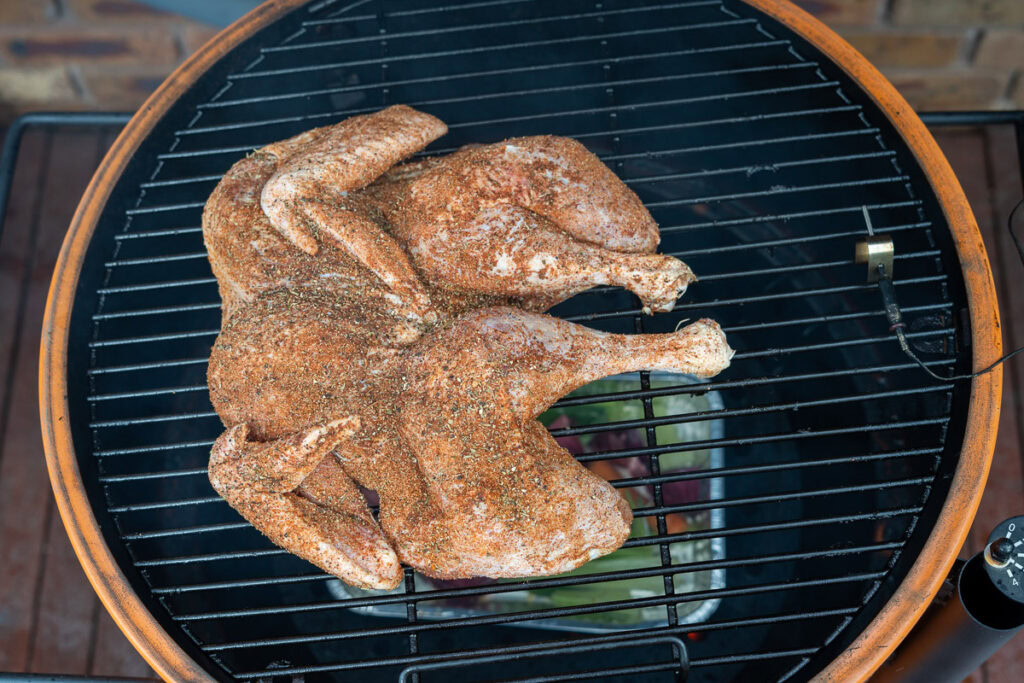
With the spatchcocking and dry brining done the day before, you should now have a flattened turkey with dry skin ready for seasoning and throwing on the smoker.
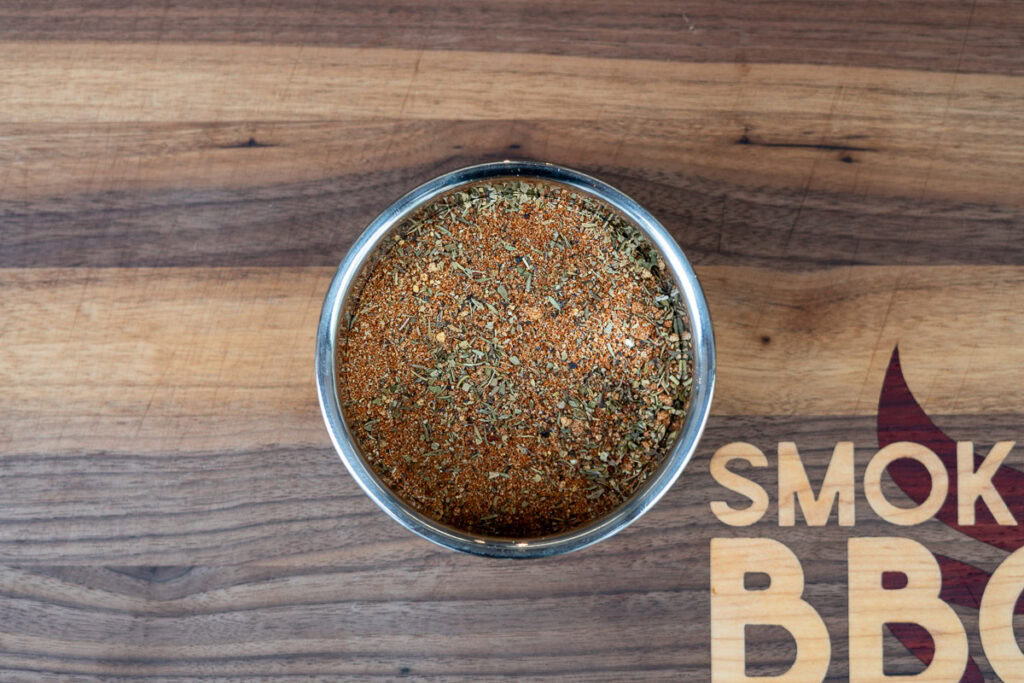
1. Season the turkey
Mix up a batch of our Turkey Rub but leave out the salt. You’ve already dry brined, so you don’t want an extra salty seasoning. If you’re using a store-bought rub, check the label and avoid anything heavy on salt.
Loosen the skin over the breasts by sliding your fingers underneath and working your way down each side. This lets you add seasoning directly to the meat and helps the skin crisp up.
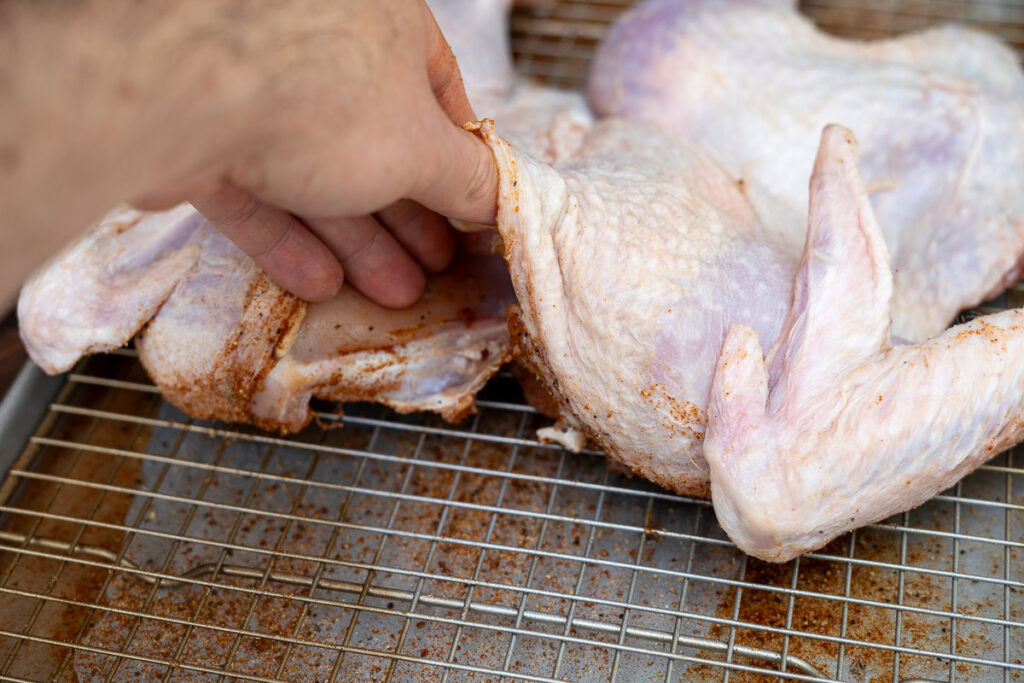
Add about a teaspoon of rub under the skin of each breast and spread it out with your hand.
Start with the back while the turkey is breast-side down and season generously then flip it over and repeat.
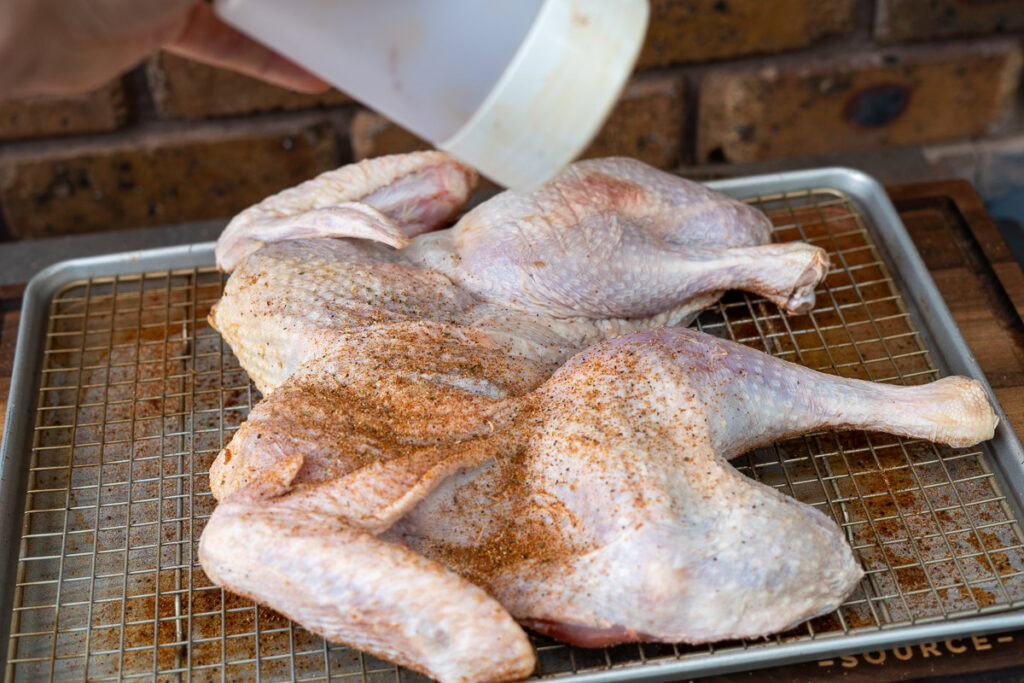
Lift the wings and drumsticks so you hit every surface. A turkey can take a lot of seasoning.

I like to finish with a light layer of freshly ground black pepper. I skip binders for this recipe because the skin is already dry from the brine and the rub sticks well on its own.
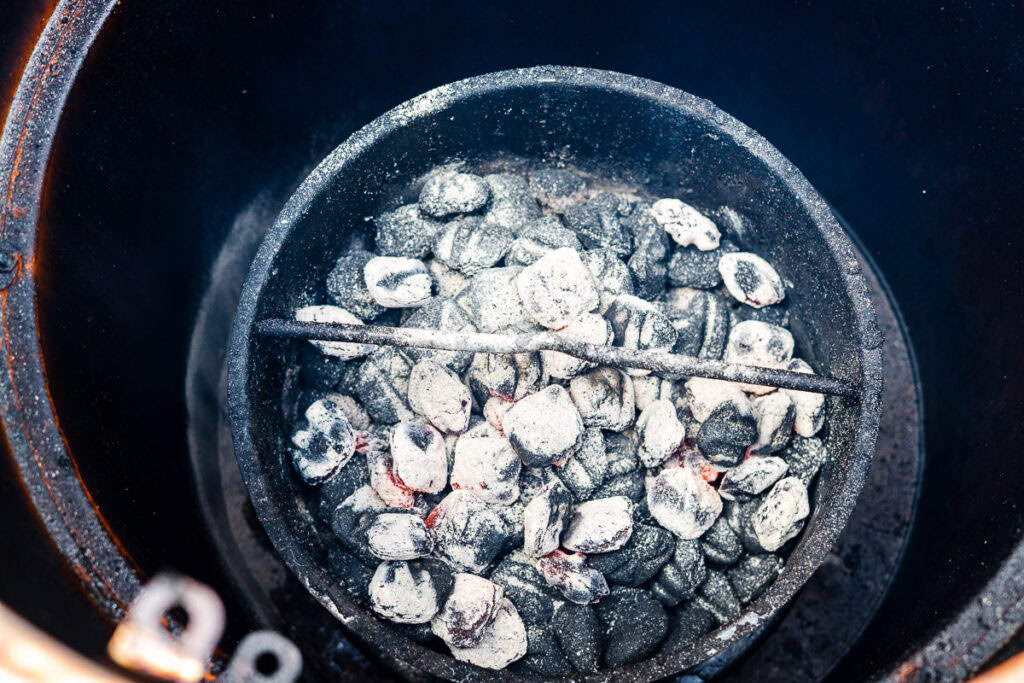
2. Fire up your smoker
If you’ve dry brined properly and the skin is nice and dry, 275–300°F is the ideal range to smoke a spatchcock turkey. If you skipped the dry brine, bump the temperature up to around 350°F to help the skin tighten and render.
I like smoking poultry on my charcoal Oklahoma Joe’s Bronco Pro because it holds temperature almost as steady as a pellet grill, but use whatever cooker you have.
I used apple wood chunks for this cook, but any mild wood works well, like cherry, pecan, or maple.
Give your smoker enough time to come up to temperature, settle in, and produce clean smoke. A little extra time here only helps—the seasoning can sit on the turkey while the smoker stabilizes.
3. Set up a gravy tray (Optional)
I like to place a tray of chopped vegetables and stock under the turkey to catch the drippings. It makes a great base for gravy and saves you from cleaning burnt drippings out of your smoker.
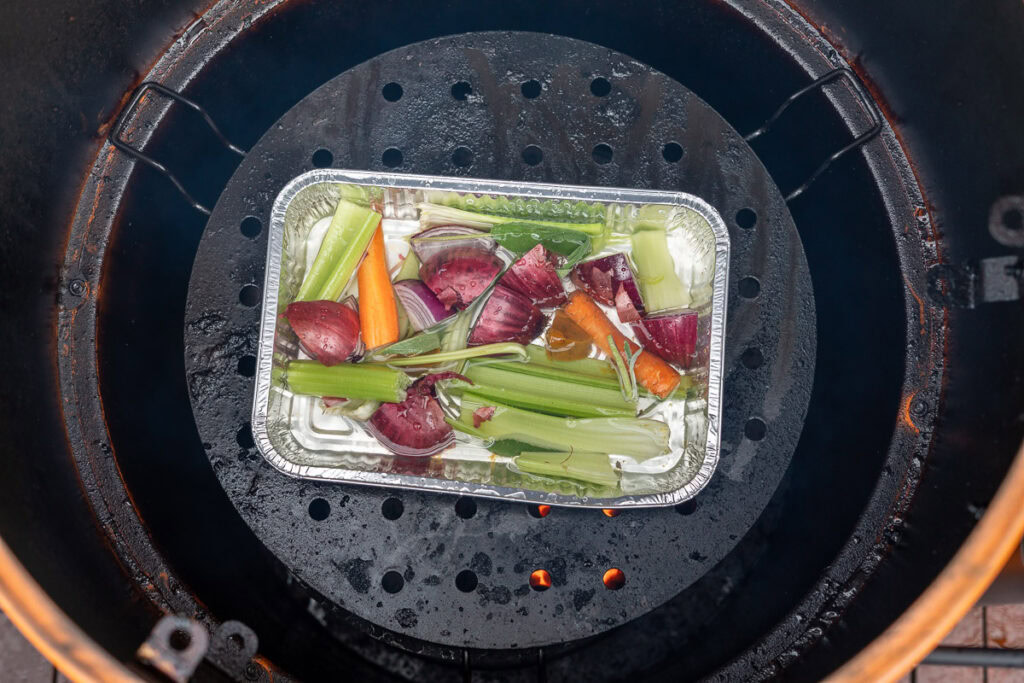
Just roughly chop some onion, carrot, and celery, add a few fresh herbs (I used sage), pour in some chicken stock, and set the tray beneath the turkey. If you saved the backbone from spatchcocking, add that too for extra flavour.
4. Smoke the turkey
Once the smoker is steady and the smoke is clean, place the turkey on the grates. Position the wings and legs so they sit evenly. This helps the turkey cook at the same rate across the grate.
Let it smoke for about 1½ hours. I like to rotate the bird once or twice during this time to promote even browning. After the first check, look at the wing tips and drum ends. If they’re starting to darken faster than the rest of the turkey, wrap them loosely in foil.
At around the 90-minute mark, start checking the breast every 10 minutes or so. Once the breast reaches about 145°F, melt some butter with chopped sage, cracked black pepper, and a squeeze of lemon in a small pan.
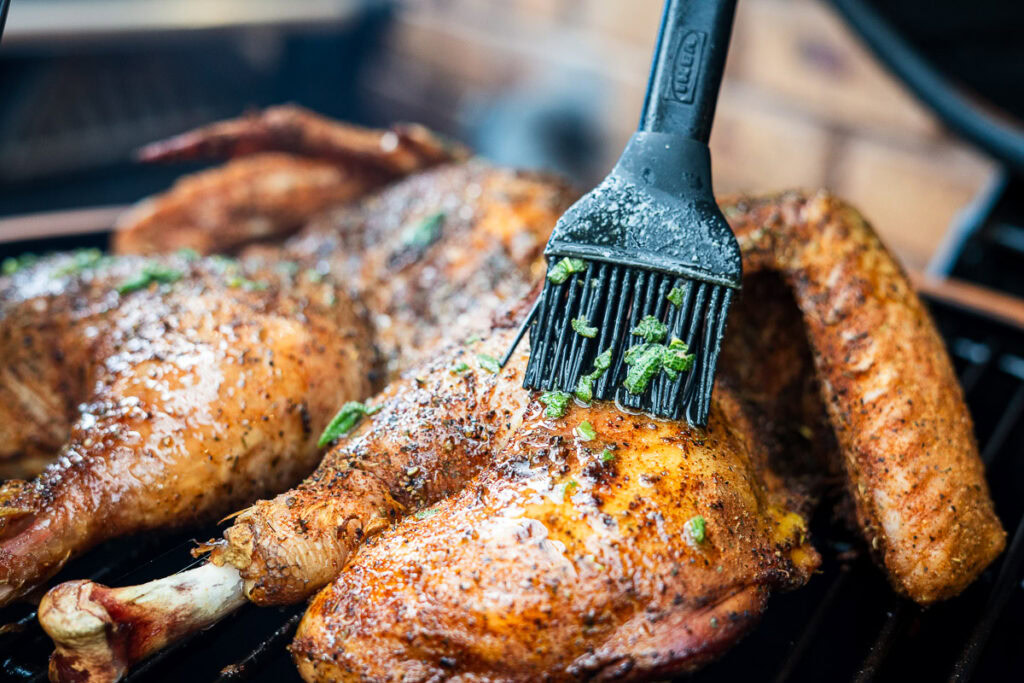
Brush this over the skin and continue cooking until the breast reads 160°F. Carryover heat will take it to a safe 165°F while it rests.

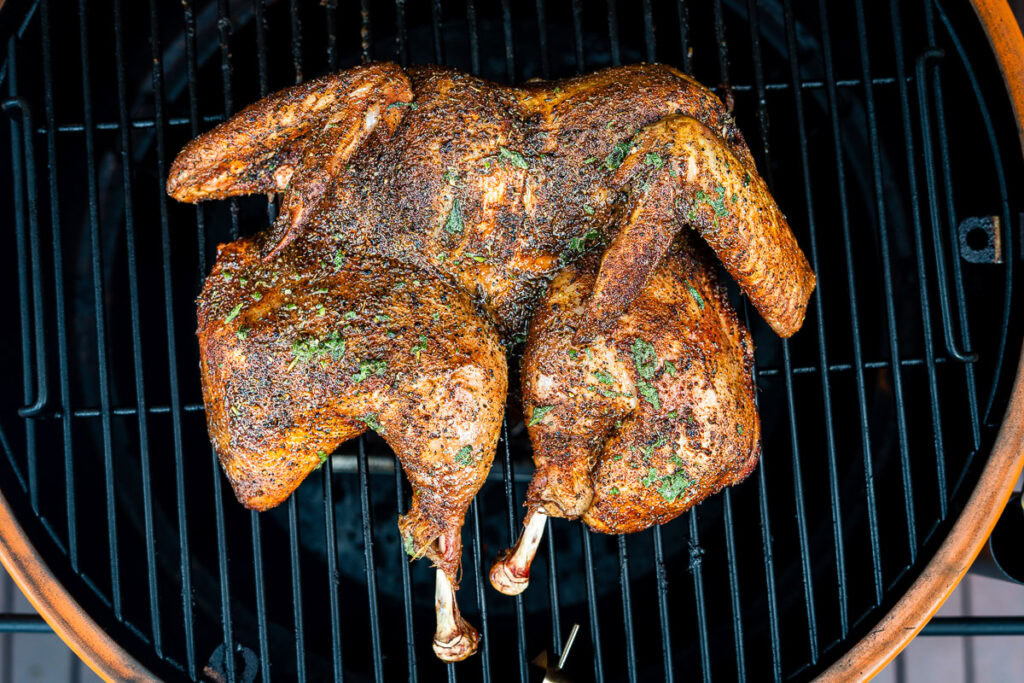
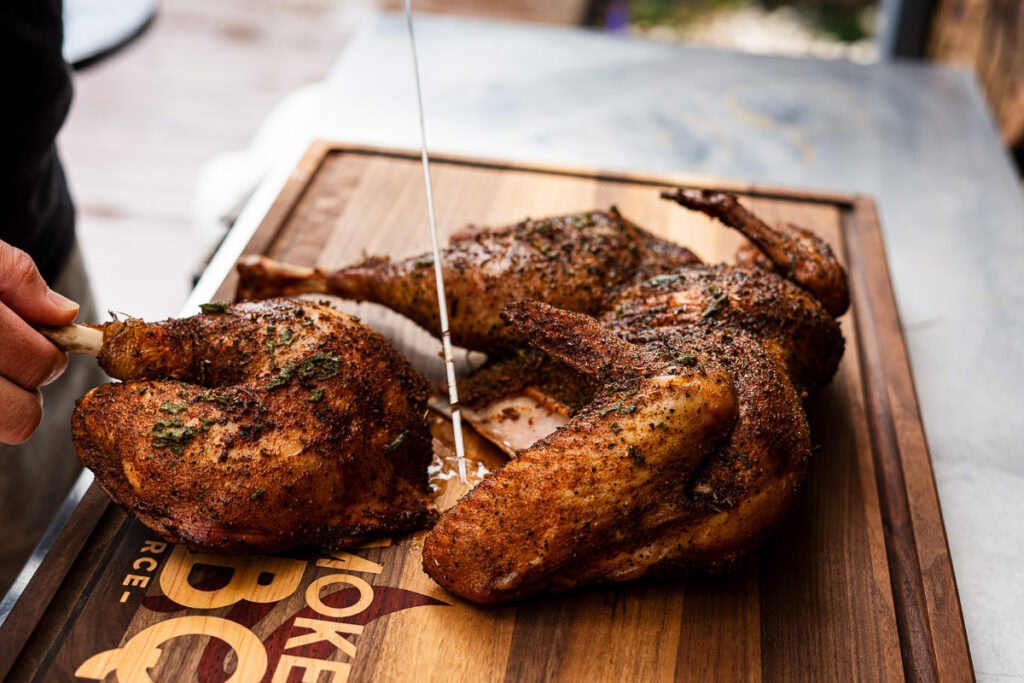
5. Rest and carve
Pull the turkey from the smoker once the breast hits 160°F. The thighs and legs can reach 175–180°F without drying out.
Let the turkey rest for about 20 minutes, uncovered. Wrapping in foil will soften the skin, so skip it. The turkey will stay hot enough.
Carving a spatchcock turkey is straightforward, especially if you removed the ribs and keel bone. Start with the leg and thigh: lift the piece, follow the joint with your knife, and it should come off cleanly. Leave it whole or separate the drumstick and thigh.
Next, remove the wing. Taking a small slice of breast with it helps. With the centre bones gone, you can then lift each breast off in one clean piece and slice it across the grain.
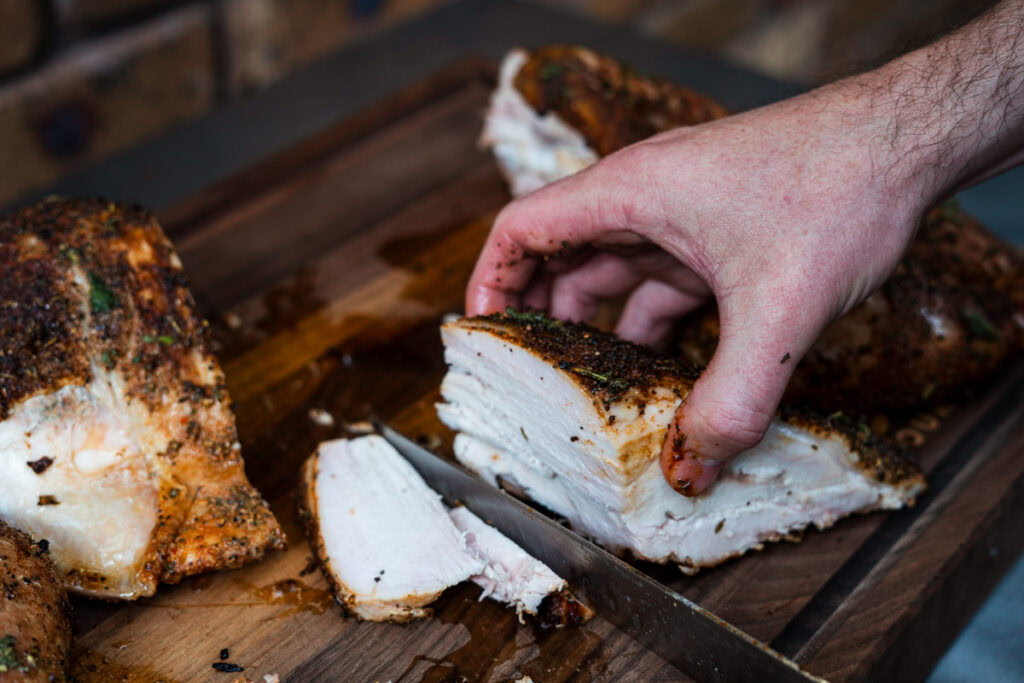
Arrange everything on a platter so people can grab what they like.
What to serve with spatchcock turkey
These are reliable Thanksgiving sides that match the smoked turkey and keep the meal easy to serve.


Smoked Turkey FAQs
How long does it take to smoke a spatchcock turkey?
At 275–300°F, a 10–12 lb spatchcock turkey usually takes 2 to 3 hours.
Flattening the bird speeds up the cooking and helps it brown more evenly. Start checking the breast around the 90-minute mark and cook until it reaches 160°F. Carryover heat will take it to 165°F during the rest.
What wood is best for smoking turkey?
Mild woods work best. I like apple, cherry, pecan, or maple. They add clean smoke without overpowering the meat. One or two chunks at the start of the cook are usually enough.
Do I need to inject the turkey if I dry brine it?
No. A dry brine seasons the meat all the way through and helps the skin dry out. Because you’re using a salt-free rub and finishing with sage butter, you don’t need an injection for moisture or flavour. If your turkey is pre-brined, self-basting, or kosher, skip the dry brine or reduce the salt.
Is a little pink in turkey meat safe?
Yes, as long as the turkey hits 165°F at the thickest part of the breast. Smoke, young birds, and chemical reactions during cooking can all leave a pink tinge. Temperature is what matters, not color.

Smoked Spatchcock Turkey
Ingredients
- 10–12 lb turkey - spatchcocked
- 2-2.5 tbsp kosher salt - use ¾ teaspoon kosher salt per pound of turkey.
- 1 tsp baking powder
- 5 tbsp turkey rub - use our smoked turkey rub but leave out the salt if you're brining.
- 1 tsp freshly ground black pepper - apply as a light final layer after the rub for extra colour and a fresh pepper flavour.
For the butter baste
- 3 tbsp butter
- 2 tbsp fresh sage - roughly chopped
- ½ tsp cracked black pepper - slightly crushed
- squeeze of lemon juice
Gravy tray (optional)
- 3 cups chicken broth
- 2 onions - skin on, cut into chunks
- 2 ribs celery - cut into 2 inch pieces
- 2 carrots - cut into chunks
- 1 tbsp fresh sage or thyme sprigs
Instructions
Prep the day before
- Place the turkey breast-side down. Remove the backbone using poultry shears. Flip the turkey over and press firmly on the breast until it cracks and the bird lies flat.
- (Optional) Remove the keel bone and rib cage to help the turkey sit flatter and make carving easier.
- Pat the turkey dry. Season with 7–8 teaspoons kosher salt and 1 teaspoon baking powder for a 10-lb turkey. Use ¾ teaspoon kosher salt per pound if your turkey is a different size.Sprinkle half the mixture on the underside, then flip and season the skin side with the rest.Place the turkey on a rack over a tray and refrigerate uncovered for 24–36 hours.Do not rinse on cook day. Pat the skin dry and it’s ready for seasoning.
Smoking the turkey
- Loosen the skin over the breasts. Add ~1 teaspoon rub under the skin of each breast. Season the back, then flip and season the skin side. Finish with freshly ground black pepper.
- Preheat smoker to 275–300°F. Use mild wood like apple, cherry, pecan, or maple.
- Place chopped onion, carrot, celery, herbs, and chicken stock in a tray under the turkey.
- Place turkey on the smoker and cook for 1½ hours, rotating once or twice. Foil wing tips or drum ends if they darken too fast.
- Start checking the breast temperature every 10 minutes after 90 minutes. At 145°F, baste with melted butter, chopped sage, lemon, and cracked pepper.Cook until the breast reaches 160°F.
- Rest the turkey 20 minutes, uncovered. Remove legs, thighs, wings, then slice the breasts across the grain.
Making the baste
- Melt the butter in a small saucepan over low heat.
- Add the butter, fresh herbs, black pepper and lemon juice and cook on low for a few minutes, stirring frequently until nice and fragrant. Set aside.
Making the gravy (optional)
- Chop the vegetables into pieces and add to an aluminum drip pan with all of the dry ingredients and backbone from the turkey.
- Place in your smoker, preferably under where the turkey will be sitting, and then pour in the liquid ingredients you are using.
- Remove after the turkey has finished cooking, and strain until you are left with only the liquid.
- Make a medium roux by melting 2 tbsp butter in a saucepan before whisking in 2 tbsp plain flour. Continue whisking for a few minutes until it has turned a light caramel color.
- Slowly pour in 1/2 cup of the gravy liquid, whisking as you go to avoid lumps.
- Slowly add the rest of the liquid, whisking as you pour it in.
Nutrition
Nutrition information is automatically calculated and should be used as an approximation only. If you’re worried you could always add a side of kale.

About Your Pitmaster
Joe Clements is the founder and editor-in-chief of Smoked BBQ Source, a leading barbecue resource that has helped tens of millions master grilling and smoking. Growing up in a vegetarian household, his love for barbecue was unexpected. Determined to master the craft, he launched Smoked BBQ Source in 2016 to document his journey from amateur to pitmaster.
Joe leads a team of expert barbecue creators and oversees the largest collection of in-depth grill reviews and a library of tested, foolproof recipes. Whether he’s firing up a pellet grill or charcoal kettle, he’s passionate about making barbecue approachable and enjoyable for all.
this is an amazing, comprehensive guide…thank you so much!
I was wondering if the breast is at 165 when removing the turkey from the smoker, Is the dark meat cooked enough?
No. Normally dark meat takes longer and runs 10 degrees or so cooler than breast
So would you take the breast out only and continje to cook the legs/thighs until they reach 165?
The legs/thighs should be higher temp than the breast.
What about using an electric smoker? Temp-wise, mine does not go up to the recommended temperature. (275° is my max) I have a Masterbuilt.
Check our guide for cooking a turkey in an electric smoker.
i am 74 years old and learned by watching my grand daddy BBQ whole hogs,
we killed them and gutted them then all the hair off after submerging in the right temperature water so hair will come off easy
then put the 2 hogs on a home made grill, at 5 am and added hot coals to the pit indirect and normaly took around 12 hours, so very good
just want to say, i still learn a lot from your articles and enjoy them.
i guess we did a spatch cock hog, cut halfway thru the back bone from the inside and opened the hog up like a book skin up and never turned it untill the hog and skin was done and then flipped the hog and added the sauce
thanks again for sharing your knowlege with us out here
Thanks Nick, appreciate your comment. I bet those whole hogs tasted good!
I use a 5gal home depot bucket for brining. I only do 12lb Turkey or less so it fits perfect and easy to get in and out of the fridge with the handle. Just have to remove one small shelf in the fridge overnight.
Sounds good
First time smoking a Turkey that I had crispy skin! Followed the detailed instructions closely, with dry brining, and have never had such a moist, tasty result.
Thank you for the detailed guidance. It made all the difference.
I did our Thanksgiving turkey using this recipe and it was fantastic. Everyone loved it. Your directions on spatchcocking and dry brining were very helpful. This is the only way to smoke a turkey!
Mate!
Out your boots.
This recipe is legit – Christmas Day feast.
Juicy, Smokey and crispy skin.