
Traeger Tailgater Portable Pellet Grill Review
SmokedBBQSource is supported by its readers. We may earn an affiliate commission at no extra cost to you if you buy through a link on this page. Learn more.
Traeger is by far the biggest name in pellet grills. Most of their grills are large, heavy, ground-bound units.
With the Tailgater, Traeger has tried to keep all the features we love about pellet grilling and pack them into a more compact, portable package.
I’ve been cooking on the Tailgater for a few months, both grilling and smoking. In this review, I’m going to share all of my experiences.
Read on to see how the Tailgater performed, and how it stacks up against the rest of the portable pellet grills in its class. So let’s get to it.
- Great at grilling and smoking
- Folds down to easily fit in the trunk
- Easy to clean
- Folding legs can be tricky for one person to deploy
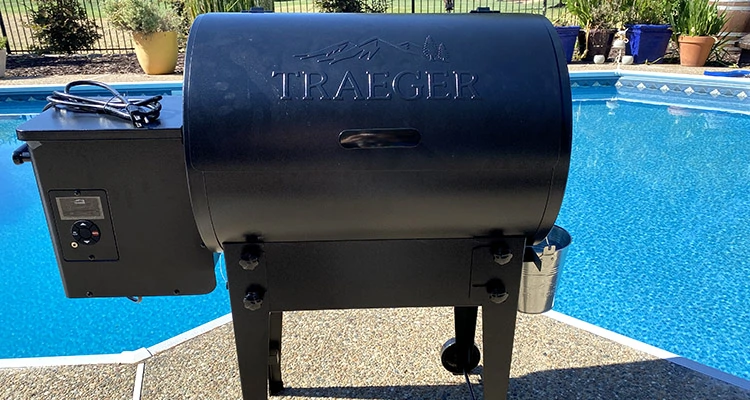
Overview and first impressions
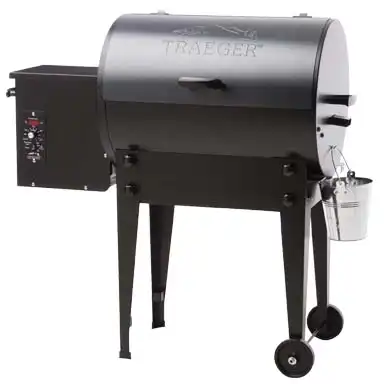
The Tailgater is Traeger’s most popular portable pellet grill. It is built to be conveniently portable for, you guessed it, tailgating.
Traeger also sells the Ranger which is more of a camping grill and has a lot less space to work with.
The Traeger comes with a 10-minute shutdown cycle to ensure no fires from leftover pellets. This allows you to focus on friends and family while watching the game.

The wheels on the unit allow for it to be portable on almost any surface and the installation is simple and secure.
Here are the full specs of Traeger Tailgater:
| Temperature Range | 185°F – 450°F |
| Total Cooking Space | 300 sq in (37 x 18 x 36 in) |
| Total Weight | 62 lbs |
| Power Source Type: | Electric and wood burning |
| Warmer Setting | 165°F |
| Pellet Hopper Capacity | 8 lbs |
| Additional Features | Built-in timer & meat probe |
| Price | Check Latest Price |
What I like:
- Consistent temperature: There is bound to fluctuations in these portable pallet grills, but far less in the Tailgater than others I’ll mention later.
- Portability: The unit is quite small once folded and can fit in most trunks and doorways.
- Easy to Clean: Interior parts are easily removable and it does not produce much ash.
What I don’t like:
- Grill Legs: While stable once completed, the folding legs are awkward to deploy and break down, especially with one person.
- Controls: Vague! Some buttons and arrows without much explanation unless you have the instructions nearby.
- Small Pellet Hopper Capacity: The 8lb pellet hopper is one of smallest in it’s class.
Desepite those nitpicks, the Traeger Tailgater has been the best performing option out of all the portable pellet grills I’ve cooked on.
Assembly and set up
The assembly of the grill was simple and easily directed by the instructions provided. All of the materials and tools are provided, so there is no need to dust off your old toolbox.

In total it took me about 30 minutes to secure the legs to the hood as well as install the interior components (heat baffle, grease drip tray, and grill grate).
Most assembly materials were in the designated place for installation. The parts that were not in place are labeled by numbers and letters that match together. I recommend wiping down the hood before installing the electric pellet hopper (with the auger included) and fire pit accessory.

One thing I noticed was the grease pan being difficult to place and remove for cleaning purposes as a result of its wide surface for the smoke to disperse throughout the hood. It is recommended to use mitts or gloves when removing as the grease drip tray is easier to clean when warm, not hot.
First use
The controls are confusing without the directions in hand. They’re simple once you know which arrows to push, but there is no writing on the panel – so keep the instructions handy.
First I primed the grill with pellets in the priming setting that can be set on the LED unit to make sure that pellets enter into the firepot PRIOR to adding the interior components of the grill grate, grease drip tray, and heat baffle.

After I checked the operation of the pellet feeder, I heated the grill to 450°F (250°C) for 30 minutes in order to complete the seasoning process. Then the grill was ready for cooking.
After each use, there is a 10 minute cool down mode before shut down.
Cooking on the Traeger Tailgate
Grilled classic burgers
My first experience in grilling with the Traeger Tailgater was a classic burger with Montreal Steak seasoning. I made sure to preheat the grill at 450°F for at least five minutes before throwing the burgers on.
The burgers fit well on the grill, and it was convenient to not worry about them burning over direct heat. I was able to use the timer built-in on the Traeger to time out the longevity of the grilling.

The electronic unit required the use of two out of the five buttons for essentially every setting of the LED screen. This made the timer, attachable meat probe, temperature, and shut down cycle not very user-friendly. While versatile with all of these features, the Traeger LED unit was somewhat of a pain to use.
The grill can fit up to twelve ½ lb burgers in total. The temperature fluctuated between 420°F and 450°F. They took about 6 minutes on each side (I used an 80/20 lean to fat ratio mix). The burgers turned out juicier than a traditional propane or charcoal grill while maintaining shape well.

They did not have the char that you would normally get on a traditional grill, but they were infused with more of a subtle, smoky flavor that blended well with the sliced gouda I placed on each of them. The melted sliced gouda was the perfect accent on this burger as it was not boiling from the high flame of a traditional grill.
Smoked chicken thighs
The second dish I prepared with the Traeger was a pound of brined chicken thighs that I smoked in order to test the capabilities of both grilling and smoking. The pound of chicken thighs fit comfortably on the grill grate, but any other quantity would have been too much.
I had found the recipe for the brine on the Traeger website which included the following as well as water and salt:
- 1/3 cup brown sugar
- 6 or 7 garlic cloves, minced
- 3 tablespoons smoked paprika
- 3 tablespoons Italian seasoning
- 2 tablespoons black pepper
- 2 tablespoons white pepper
I smoked the chicken thighs at 185°F (which took 3 min to get to) for 60 minutes and then increased the temperature to 350°F (which took 3.5 min to get to) for another 60 min. The temperature fluctuated between 210°F and 225°F the entire time when set at 185°F.
The temperature was easy to change and set on the electrical unit from 185°F to 350°F mid-smoke.

The Tailgater struggled to maintain a low temperature of 185°F. I ended up setting the temperature lower than normal to ensure the proper smoke as the temperature ran hot and fluctuated.
Regardless of the variance in temperature, the chicken thighs came out juicy with crispy fall-off skin. The flavor was great on each thigh with a pink smoke ring on the outer portion just under the skin.
Smoked pork ribs with dry rub
My last test of the Traeger was smoking 3 racks of pork ribs with a classic dry rub. The dry rub consisted of dark brown sugar, salt, and pepper. I initially set the temperature at 225°F (which took 3.5 min to get to) and intended to smoke the ribs for 3 hours.

I ended up setting the temperature lower again at 185°F as the temperature ran hot, fluctuating between 190°F and 210°F, to ensure the proper smoke for 1.5 hrs. After, I adjusted the temperature to 225°F as it fluctuated between 230°F and 250°F to ensure the thorough cook for the rest of the smoke.
The ribs came out after 3.5 hours with a great smoked pork flavor.

Performance
I tested the heat surrounding the interior of the unit by placing three probes on the right, left, and middle. I used the Traeger probe which attaches directly to the electrical unit as well as my personal Inkbird IBT 4XS wireless temperature thermometer. The probe I set on the right indicated the highest temperature.
The hot air being blown travels underneath the grease drip tray and projects against the right wall of the hood for an all-around, convection-style smoke.
| Set | UT | Probe A (R) | Probe B (L) | Probe C (M) |
|---|---|---|---|---|
| 225°F | 250°F | 338°F | 270°F | 284°F |
| 350°F | 353°F | 419°F | 354°F | 372°F |
It took 3.5 min to get to 350°F from 225°F.
The grill had difficulty holding temperatures lower than 250°F. It was clear that the hottest part of the grill was the right side of the hood along with the edges of the grease drip tray. I made sure to place the largest, juiciest pieces of meat in the center to prevent direct heating from the edges.
Cleaning
Cleaning of the unit involves the removable parts of the grill grate, grease drip tray, and heat baffle. I wrapped the grease drip tray in aluminum foil prior to my use of the grill so that I could clean the grill grate with a brush, remove the grate, and then peel off the foil with ease once the grill was cool.
While the aluminum foil might alter the temperature slightly, it is safe to do so and allows for a much easier cleaning process. Once this was completed, I removed the heat baffle to vacuum the ash and remaining pellets from the fire pit accessory for safety.
The entire process of cleaning took me about 10 minutes with the removal of foil, washing of the grill grate, and vacuuming of the fire pit. Cleaning is recommended after each use, but I found it was only necessary after every few uses.
Traeger VS the competition
If you spend hours monitoring grill temperatures as I have done with the GMG Davy Crockett, the Pit Boss Sportsman, and the Camp Chef Pursuit, the uneven grill temps and temperature fluctuations can be maddening.
I have to commend Traeger, their Digital Arc Controller provides a more even, (although not precise) temperature across the grill, and flatter peaks and valleys.

Most of those other grills offer some type of increased functionality (Wi-Fi, Bluetooth, searing louvers, larger hoppers, easier control functions, better wheels, etc.,) that are not found on this Traeger.
This is a no-frills pellet smoker, but what it does, is cook better than the competition. This coming from a one-time skeptic of all those that can’t start a sentence about BBQ without saying “I put it in my Traeger…” aka the Traeger Nation.
Should you buy the Traeger Tailgater
The folding legs, while kind of a process, are still manageable to fit the entire unit in the bed of a truck or trunk of a car.
The use of the LED controls was not user-friendly as it took me a few tries to complete each task like priming and turning on the shutdown cycle.
Grilling and smoking at higher temperatures (above 200 degrees F) were the sweet spot for this unit. It’s portable enough to live up to its name “Tailgater.”
If you are looking for a grill and smoker that is no-frills and does the job without constant monitoring, this could be your next grill.
- Great at grilling and smoking
- Folds down to easily fit in the trunk
- Easy to clean
- Folding legs can be tricky for one person to deploy
I grilled and smoked meats that are standard at a barbeque, but there are endless recipes Traeger and Traeger users have come up with. Some of the other possibilities include jerky, bread, and even cakes.
I think beyond some minor design flaws, the Tailgater cooks better than any I’ve tested in its class.