
How to Cure & Smoke Beef Bacon

SmokedBBQSource is supported by its readers. We may earn an affiliate commission at no extra cost to you if you buy through a link on this page. Learn more.
Love bacon and want to try something new?
Beef bacon is made just like pork bacon, and can be used in many of the same ways but brings a different flavor profile that many people prefer.
The curing process takes a full seven days, so this recipe will require some planning but it’s worth the wait!
Pork bacon vs. beef bacon
If you’re a bacon aficionado, you’ll already know that bacon is most commonly made by curing and smoking pork belly.
Pigs aren’t the only animals with bellies, though!
Just like regular bacon, beef bacon is made by curing, smoking, and then slicing
The smoky flavor profile is similar to pork bacon, but with beef bacon, you get a delicious, rich, beefy taste, resulting in much more flavor!
Reasons to try beef bacon:
- Beef bacon makes for a great alternative if you choose not to eat pork
- Beef bacon is lower in fat and contains more protein per slice
- It’s fun to make!
Where can I find beef belly?
You’re probably not going to find beef belly readily available at your local grocery store. You could try checking in with your local butcher to see if they carry it or if they can order it for you.
For this cook, we got our beef belly from Porter Road. You can also smoke beef belly for a brisket-like taste in about half the time.
If you can’t be bothered with this recipe Porter Road also sell ready-made beef bacon if you want to give it a try.

You don’t strictly have to use beef belly, either. Just like with pork, you can use a variety of cuts to make bacon, including brisket and round
How to make beef bacon
1. The cure
The cure is designed to remove water from the meat as a method of preserving it.
You need to ensure that you include pink curing salt, and that your seasonings have a flavor profile that you prefer.
I picked up the pink curing salt from my local butcher, but there are many places online where you can order it from.

For this recipe, I stayed very basic with the seasoning using brown sugar, salt, and black pepper.
2. The curing process
The curing process usually takes seven full days for every inch of thickness.
I know that this seems like a long time, but you are infusing flavor into your meat, and you need to allow it to penetrate and make sure that the cure does its job.

When applying the cure to your beef belly, make sure all sides are well coated.
Place it in a vacuum seal bag or a Ziploc bag and place it in the fridge.

Throughout the 7-day cure, you will notice a lot of liquid from the beef belly. You want to make sure that you flip the beef belly and gently massage it every day. This helps the juices and flavors to move throughout the whole cut and not just sit on one side of the meat the entire time.
Plus there’s something extra satisfying about massaging your beef.
You’ll know that your meat is cured when you can poke it, and you notice that there is some resistance and it starts to firm up.
3. Drying
After a week of flipping and massaging, remove the beef from the bag, and rinse it well with some water, removing as much cure as you can.
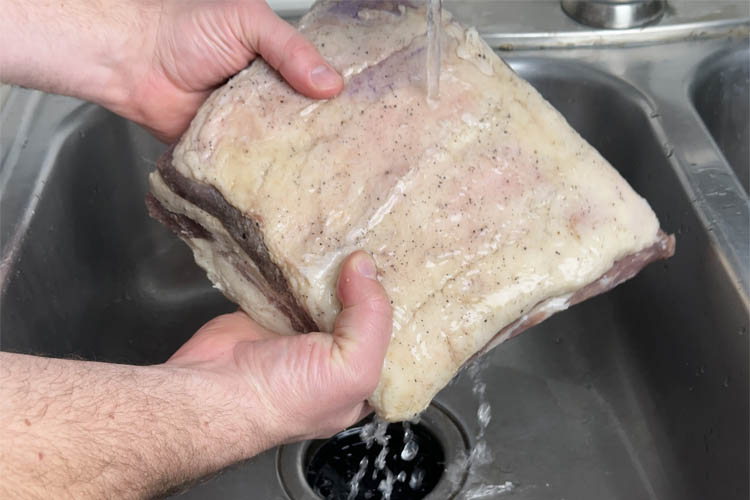
Place the rinsed beef belly on a wire rack, with a tray underneath to catch any dripping liquid, and put it back in the fridge, uncovered, overnight so that it can dry out and the pellicle can form.
A pellicle is a thin coating that forms on your beef belly that helps smoke stick to the meat allowing it to get a richer smokey flavor.
If you are short on time, a few hours will work, but 24 hours is the ideal time frame.
4. The smoking process
There are many different smoke kinds of wood that you can choose to use on your bacon. For this cook, I used one of my favorite smoke flavors for beef – pecan wood. Pecan wood has a sweet, nutty flavor that pairs well with beef.
The amount of smoke flavor you want in your meat is entirely up to you and what you’re going to be using it for.
Typically, when you buy bacon from the store, it has a very mild smoke flavor.
If you want a deep-smoke flavor, add wood to your cook.
The key to smoking your bacon is making sure that your temperature is kept low and slow.
I smoked this beef belly today using my Traeger Grills Ranger. This is a smaller, compact grill that is great for on-the-go cooking.
A hidden secret about this grill is that it is an absolute beast when it comes to smoking your meat. The smaller cooking area allows for more smoke than your traditional pellet grill when cooking low and slow.
When smoking the beef belly, set your smoker to a temperature of 200°F. Once your smoker is up to temp, add your beef belly directly to the grates.

You’ll smoke this for about 3 hours or until the internal temp of your bacon is 150°F. Depending on the size of your beef belly this could either take more or less time.
The best way to check this is by using an instant read thermometer.

5. The final steps
Once the beef belly reaches 150°F internal temp, remove it from the smoker and rest for at least 30 minutes or overnight in the fridge.

Personally, I like to let it rest overnight as it allows for more precise slicing once the meat has hardened a bit.
When you are slicing, you’ll need to decide how thick or thin you want your bacon based on what you prefer and what you are using it for.
A brisket slicer works great for this process otherwise, you can also use a meat slicer machine if you have one.
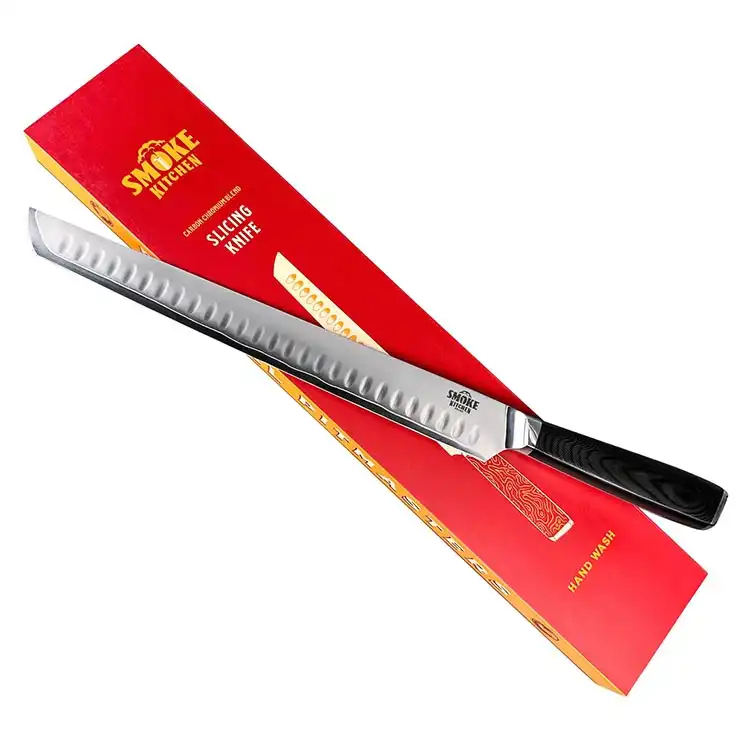
Make perfect cuts every time you're slicing brisket or any larger cut of meat
Cooking your bacon

The trick to cooking up delicious bacon is to make sure that you cook it on low heat.
I always start my bacon off in a cold pan and then cook out the moisture on that low heat. Another great method is to cook it on a cookie sheet in the oven.

You can easily store this in the refrigerator for about a week. Another great option is to freeze it right away in vacuum seal bags and it will remain fresh tasting for 6 months.
Keen to try making more things from scratch?
- How to make homemade smoked bacon
- How to make pastrami
- How to make pastrami from corned beef
- How to make smoked hot dogs

How to Cure & Smoke Beef Bacon
Ingredients
- 4.5 lb beef belly - with the skin removed
- 23 g light brown sugar
- 46 g Kosher salt
- 4.5 g pink curing salt
- 2 g ground black pepper
Instructions
- Combine all the ingredients for the bacon cure and mix thoroughly.
- Rub the cure on all sides of the beef belly ensuring that all the meat is evenly coated.
- Place the beef belly into a vacuum seal bag or a gallon size freezer bag. Place in the refrigerator for 7 days and flip it over every day. There will be a liquid that forms in the bag – be sure to mix and massage this into the beef belly everyday when you flip it. This helps the flavors to evenly infuse into the meat.
- After 7 days, remove the beef belly from the bag and rinse it off under cold water. Once rinsed, place it on a wire rack with a cookie sheet or plate underneath to catch the liquid that drips off. Place back in the fridge for a minimum of 2 hours up to 24 hours to help form the pellicle.
- Set your smoker to 200°F and place the beef belly on the smoker for about 3 hours.
- Once the beef belly reaches 150°F, internal temperture, remove it from the smoker and rest for at least 30 minutes or overnight in the fridge.
- Slice the bacon as thin or as thick as you prefer – just try to make sure they are consistent.
- The bacon can be stored in the fridge for up to a week or vacuum sealed and placed it in the freezer for up to 6 months.
Notes
Brown sugar 5g per pound, Kosher salt 10g per pound, Pink curing salt 1g per pound, Ground black pepper .5g per pound What is pink curing salt? Pink curing salt is used in meat processing to generate a pinkish shade and to extend shelf life. What is a pellicle? A pellicle is a thin coating that forms on your beef belly that helps smoke stick to the meat allowing it to get a rich smokey flavor. What wood should I use for smoking? We recommend pecan wood.
Nutrition
Nutrition information is automatically calculated and should be used as an approximation only. If you’re worried you could always add a side of kale.
You’re using a mixture of different symbols for grams which can make things confusing for the reader. The only acceptable symbol for grams is “g” Lowercase, no period. I don’t know where you got “gms” from. The recipe otherwise looks good, can’t wait to try it.
Thanks for pointing that our Remek, not sure how that one happened as we always refer to grams as “g” on other recipes. I’ve fixed it, hope the beef bacon turns out well for you.