
Jalapeño Cheese Squares

SmokedBBQSource is supported by its readers. We may earn an affiliate commission at no extra cost to you if you buy through a link on this page. Learn more.

I have to admit that this recipe isn’t my own – I stole it from my mom! She’s been making them for holidays, tailgates, & potlucks for as long as I can remember.
My husband loves them so much that I wouldn’t be surprised if they were part of the reason he wanted to marry into the family – but I don’t blame him.
Jalapeño Cheese Squares
Also known as Texas Fudge, these are a perfect snack to serve a crowd. Plus, they take less than an hour to whip up and can be prepared ahead of time and reheated.
Ingredients you’ll need
- Cheese (obviously) – I like combining cheddar & Monterey Jack. A sharp cheese paired with a good melter. Pre-shredded or shred your own here.
- Bacon – I use pre-crumbled bacon from the store (shh), but you can crumble it yourself.
- Jalapeños – I prefer pickled to cut the spice, but fresh work just fine.
- Evaporated milk
- Flour – all-purpose
- Eggs

Equipment you’ll need
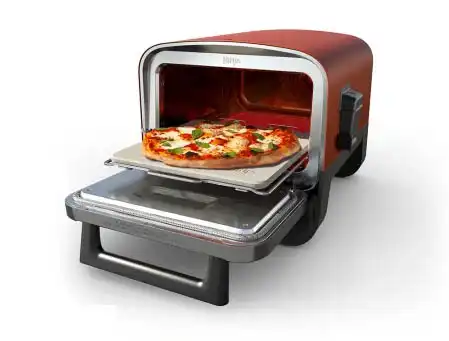
- Pizza oven – I used my Ninja Woodfire Outdoor Oven. It preheats quickly and maintains a perfect temperature for baking. A regular oven will work, too.
- Mixing bowls – two
- Whisk
- Spoon – for mixing
- Baking dish
- Beautiful design with sleek features
- Super versatile, ability to cook in many ways
- Could be slighly larger
How to make Jalapeño Cheese Squares
1. Prep
In a bowl, combine all of the cheese with the bacon and jalapeños. Give it a mix until it’s fully combined.

In another bowl, combine the evaporated milk, flour, and eggs. Whisk them together until there are no clumps left and the mixture is smooth.
Pour the wet ingredients on top of the cheese mixture and stir until everything is well incorporated. The texture should be similar to a dough or thick paste (but cheesier).
Spread the mixture into a baking dish. I used the pan that came with my Ninja Woodfire Outdoor Oven, but you can alternatively use a 9×13 baking dish.

2. Fire up the oven
Preheat the oven to 350°F.
I love to cook these on my Ninja Woodfire Outdoor Oven. While you can totally do them in a regular oven, the Ninja is great because it’s smaller and circulates air to make the squares perfectly crispy!
Find my full review of the Ninja Woodfire Outdoor Oven here!
3. Cook
Place the baking dish in the oven.

They will take 35-40 minutes, and you’ll know they’re done when the top is nice and golden brown!

4. Serve
You want to let them cool for 10-15 minutes before you slice them into squares for serving.


5. Storing and reheating
If you don’t finish them all at once, you can refrigerate them for up to 5 days.
To reheat, place them in the microwave on 50% power for 45-60 seconds.
More recipes to make in the Ninja Woodfire Outdoor Oven
- Smoked BBQ Chicken Drumsticks
- Pepperoni Pizza Rolls
- Peach Cobbler in a Pizza Oven
- Quick BBQ Chicken Flatbread

Jalapeño Cheese Squares
Ingredients
- 16 oz sharp cheddar cheese - shredded
- 16 oz Monterey Jack cheese - shredded
- ½ cup crumbled bacon
- ½ cup pickled jalapeños - diced
- ½ cup all-purpose flour
- 12 oz evaporated milk
- 2 eggs
Instructions
- Combine the cheeses, bacon, and jalapeños in a large mixing bowl.
- Whisk together the evaporated milk, flour, and eggs until smooth in a separate bowl.
- Pour the wet ingredients onto the cheese mixture and stir until well incorporated.
- Pour the mixture into a 9×13 baking dish.
- Bake at 350°F for 35-40 minutes or until the top is golden brown & bubbly.
- Let cool for 10 minutes, slice into squares, and serve immediately.
Nutrition
Nutrition information is automatically calculated and should be used as an approximation only. If you’re worried you could always add a side of kale.

About Your Pitmaster
Breanna Stark is a Texas-based competitive pitmaster and barbecue educator. She grew up cooking over charcoal and open flames while camping with her father, sparking a lifelong love of barbecue. Since 2014, she has competed in over 100 IBCA, KCBS, and CBA events, earning recognition for her award-winning chicken and Texas-style barbecue.
Passionate about recipe testing and development to create approachable dishes that help backyard cooks level up their barbecue skills. Breanna shares her expertise with over three million followers on social media.
Crispy texture on top was weird and really took away from the flavor and the texture of the middle. I have usually just done them in a regular oven, as I think most people do, and that’s more pleasant. Flour and milk are totally optional! Try it without next time and you might like it better yourself!
So then it is just egg and cheese. Wha?
Would it work just as well with crumbled sausage instead of bacon?
I’ve never tried it, but I don’t see why not! Just make sure the sausage is drained fully.
How is it that “The recipe is low-carb and keto-friendly” when it uses flour? Flour is a no-no in Keto cooking.
That’s our mistake, thanks for pointing out and I’ve removed the mention of Keto.
Is the evaporated milk size a typo? It typically comes in a 12 oz can.
Hi Stephanie, thanks for pointing that out, that was a mistake and it should read 12 oz.